This is the third post in my Kasm series.
To recap:
- First post – A comprehensive guide on installing and setting up Kasm Workspaces to fit your needs.
- Second post – How to use a Firefox Workspace as a sandboxed environment for safely opening suspicious links.
Now, let’s dive into the third post – routing all Kasm traffic through a VPN using a sidecar container!
There are two parts to this guide. The main one is how to setup the side-car container to act as a VPN gateway to route all traffic of other containers (Workspaces) through a VPN. In my case, I am using NordVPN as it supports all major platforms and personally one of my top choices. You can use any VPN you like as long as it offer a ready-made dockerized version of their VPN client or you can create one yourself.
Why you would want to do this
You might want to do this for a number of reasons including,
- Privacy & anonimity
- You want to connect your Workspaces for other networks such as your home network or other cloud networks you have
- You want your Workspaces to be tested in different geographical regions
Simply installing NordVPN on the Kasm host won’t route Workspace traffic through it because Docker containers operate in isolated networks. Kasm Workspaces don’t inherit the host’s VPN connection and will still send traffic outside the VPN, exposing your real IP. A sidecar container solves this by operating within the Docker environment, just like Kasm Workspaces. This allows us to create a dedicated Docker network where all Workspace traffic is routed through the VPN container, ensuring that no traffic bypasses the VPN. This setup also keeps the host independent, making it more secure and flexible.
How it works
What is a side-car container? As the name suggests a side-car container is a container that sits beside another container(s) and acts as a service. As explained in the last section, in this context, it acts like a VPN gateway. Essentially all other Workspaces send their traffic through this container.
We are going to use a NordVPN Docker container from Docker Hub and configure it with the credentials of our NordVPN account (if you are using a different VPN provide, you will have to adjust accordingly). Then we are going to create a dedicated docker network for the VPN and configure Kasm Workspaces to use that as their default network. We will configure Kasm Workspaces in such a way that they cannot bypass the VPN and all traffic is forced through the sidecar (optional although highly recommended).
How to create the docker network
Alright. Let’s build it. Keep in mind that this guide assumes that you have an up and running Kasm Workspaces server. Log into your Kasm server via SSH and follow along.
First we need to create a custom docker network that we can bridge to. This will act as a virtual network interface that the other containers can access. Let’s see what networks we have before proceeding. Type,
docker network ls

Create the new network. The last line is the network name. Feel free to change it up to your preferance. You can change the subnet as well but make sure there are no conflics with existing networks.
sudo docker network create \
--driver=bridge \
--opt icc=true \
--subnet=172.20.0.0/16 \
nordvpn-int
sudo apt get update
example commands
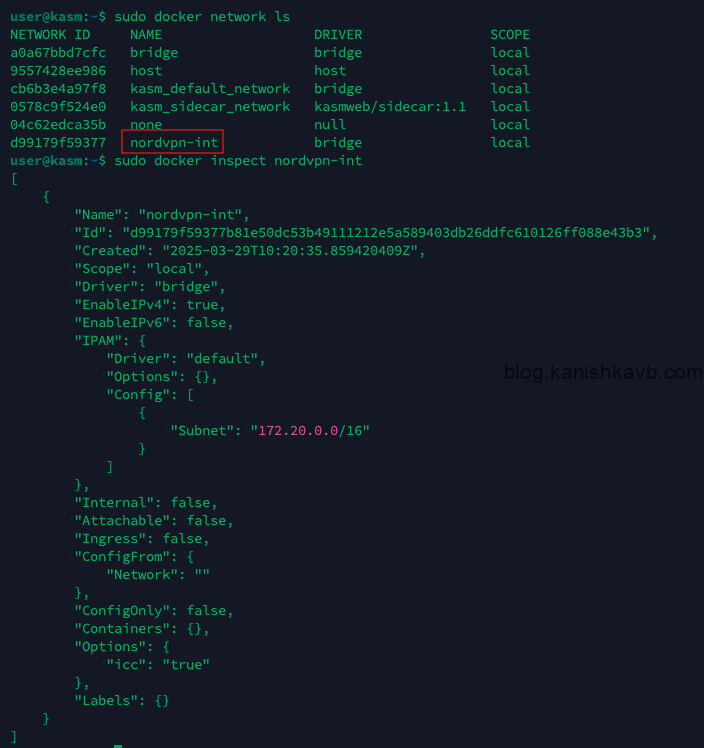
You can get the detailed view of existing networks by typing,
sudo docker network inspect
Let’s verify that the network is correctly created,
sudo docker network ls
sudo docker inspect nordvpn-int
How to get the NordVPN Access Token
Before running the NordVPN client container, we need an authentication token from our NordVPN account.
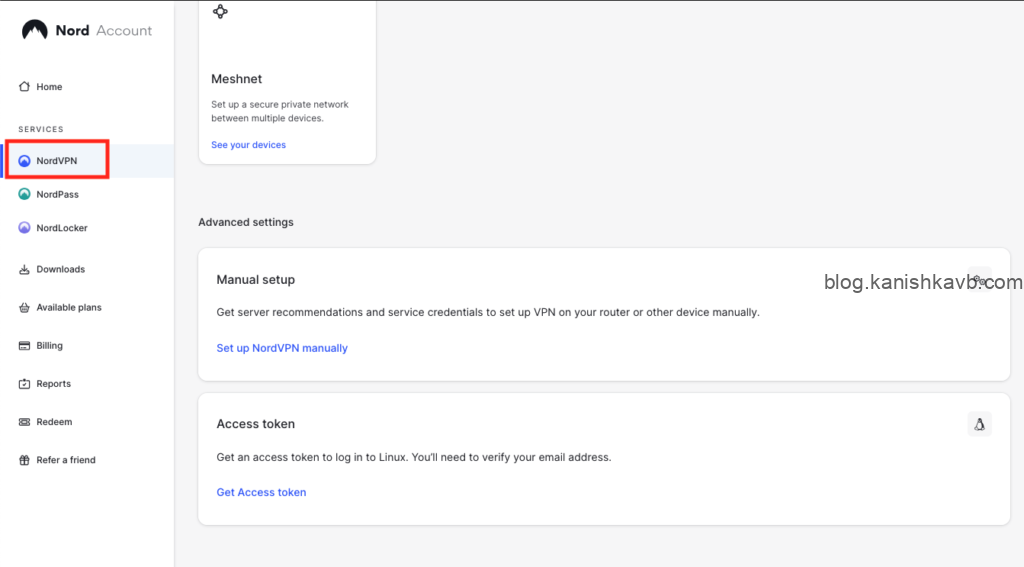
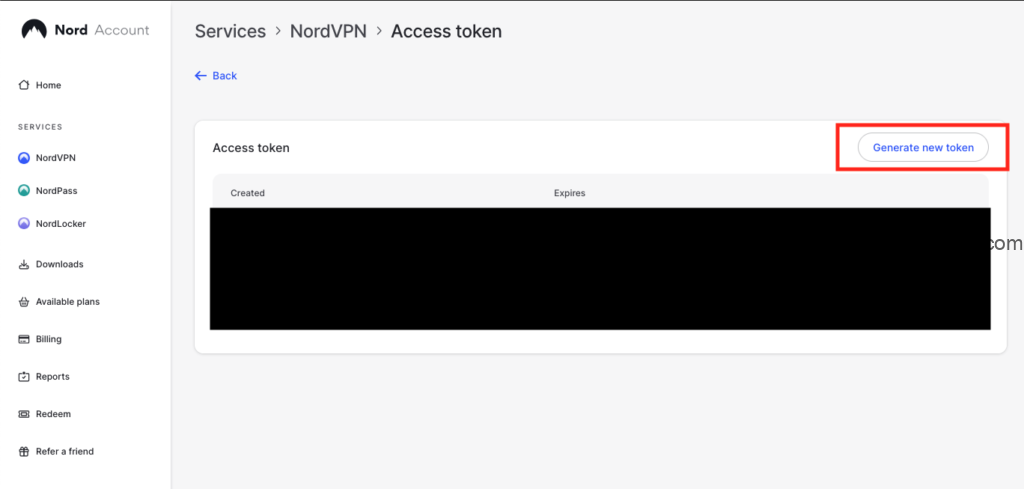
Log into your NordVPN account and go to NordVPN on the left panel. Then scroll down to the Access Token section and click Get Access Token
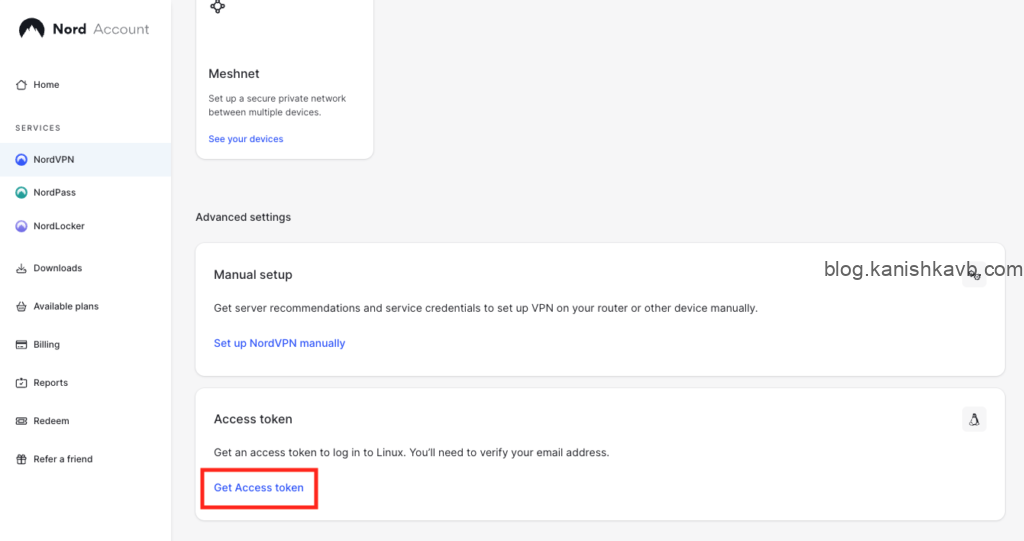
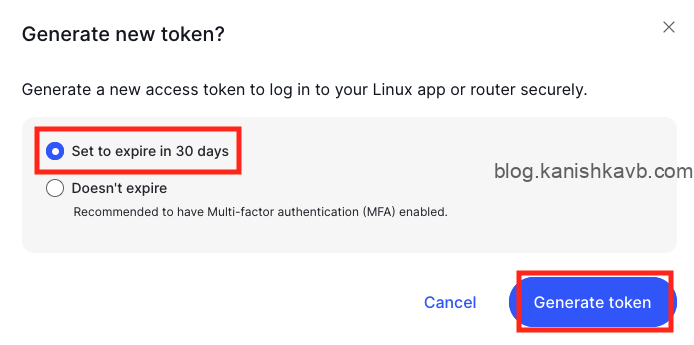
Go ahead and generate your access token. If you are planning on using it for long term, you can get an indefinite token that never expires. However, make sure that where you store the token (in this case, your Kasm server) is secure and NordVPN account has MFA. In my opinion, all of your online accounts should have MFA enabled these days anyway.
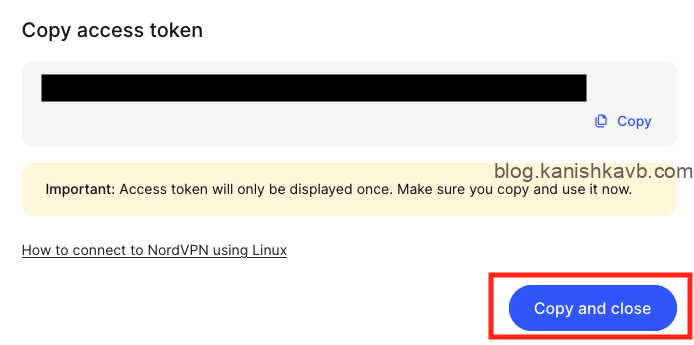
Copy your token and save it temporarily somewhere secure
How to run the NordVPN client container (sidecar)
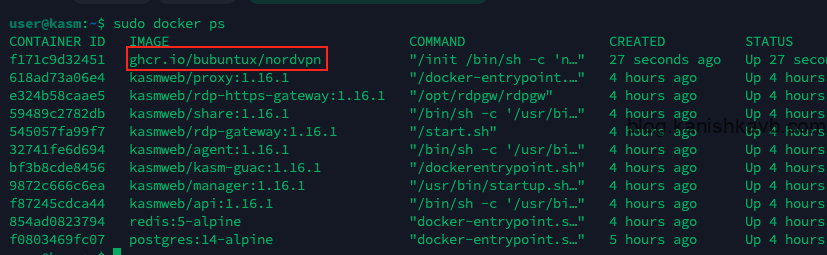
Now let’s install the sidecar container. First, let’s see what containers are running currently,
sudo docker ps
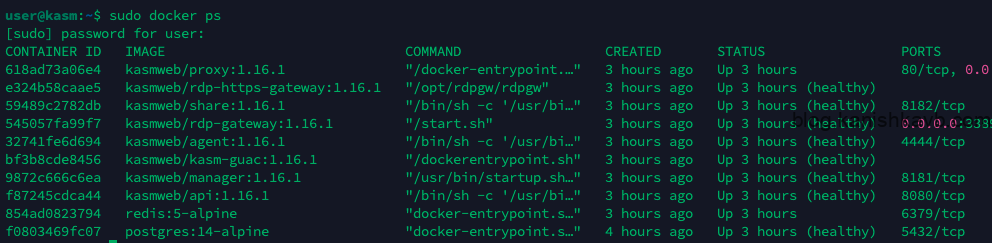
Now, these are the containers that runs by default. If you add and run any additional Workspaces, more conatiners will be added. Keep in mind that these are managed by Kasm. You don’t run these, Kasm run and manage these for you. What we are about to do is we are going to run a container ourselves along side these containers so these containers can route traffic through it.
The container I have chosen here is bubuntux/nordvpn from Docker Hub. You can check out the details here. Run the following command in the terminal,
sudo docker run -d \
--cap-add NET_ADMIN \
--cap-add NET_RAW \
--name nord-vpn \
--net nordvpn-int \
--ip 172.20.0.2 \
-e TOKEN= \
-e TECHNOLOGY=NordLynx \
-e KILLSWITCH=on \
--restart unless-stopped \
ghcr.io/bubuntux/nordvpn
Let’s take a moment to understand the key sections of this command,
sudo docker run -d \
–cap-add NET_ADMIN \
–cap-add NET_RAW \
–name nord-vpn \ ## Local name of the container. Feel free to change.
–net nordvpn-int \ ## Docker network name. Must be equal to the docker network created earlier
–ip 172.20.0.2 \ ## Local IP. Must be in the same subnet as your docker network
-e TOKEN=<YOUR NORDVPN TOKEN HERE> \ ## Your NordVPN auth token
-e TECHNOLOGY=NordLynx \ ## Protocol used to connect to NordVPN. Can be changed.
-e KILLSWITCH=on \ ## KillSwitch – If the VPN goes down, all network traffic will be stopped
–restart unless-stopped \
ghcr.io/bubuntux/nordvpn
Make sure to substitute “<YOUR NORDVPN TOKEN HERE>” with your actualy NordVPN authentication token you saved earlier. When you enter the command it will pull the container image from Docker Hub and run it.
Once completed make sure the container is up and running as expected,
sudo docker ps
Everything looks hunky-dory!
How to configure Workspaces to connect to the sidecar
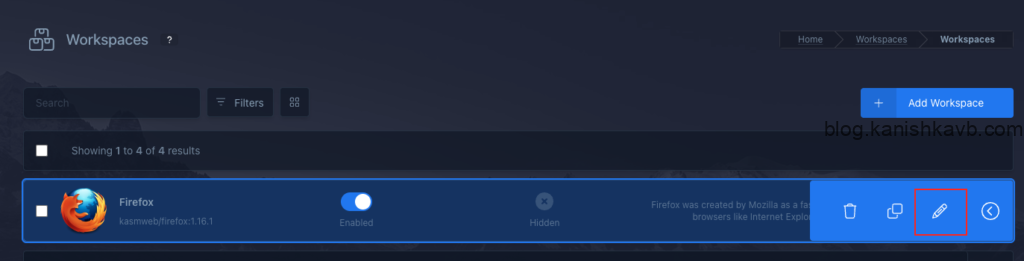
Now we need to configure the Workspaces to route their traffic through the NordVPN container and make sure they cannot and will not bypass it. Log into your Kasm Workspaces as admin and go to Workspaces settings,

Go to the edit option of the desired Workspace,
We are going to edit the Docker Exec config to change some settings inside the container at startup. This will delete the default route and add a new default route to send all outbound traffic via our custom docker network (which essentially means through the NordVPN container). It also adds NordVPN’s DNS servers as the DNS to resolv.conf to preent DNS leak.
Now scrolldown to the Docker Exec config (JSON) section and enter the following. If the container you chose already has a configuration in there, make sure to insert this correctly without removing the existing one.
{
"first_launch": {
"user": "root",
"privileged": true,
"cmd": "bash -c 'ip route delete default && ip route add default via 172.20.0.2 && echo \"nameserver 103.86.96.100\" > /etc/resolv.conf && echo \"nameserver 103.86.99.100\" >> /etc/resolv.conf'"
}
}

Finally, restrict the connectivity only to our custom docker network so the Workspace container cannot bypass the NordVPN container. Turn on Restrict Image to Docker Network option and select your custom docker network in the Docker Networks section. Optionally, you can make sure that the Allow Network Selection option is turned off to ensure that the users (or yourself) don’t accidentally select a different network and potentially bypass the VPN.

Now save and exist.
Testing and verification
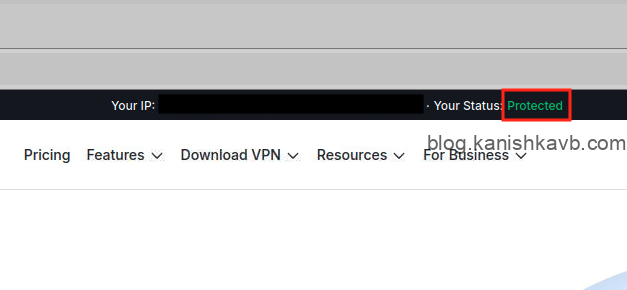
Now launch your Workspace and go to NordVPN.com. If your connection is being routed through the sidecar and in turn NordVPN, you should see your status at the top as Protected. NordVPN site essentiallly checking if your connection is coming from one of their VPN servers.
If you want independent verification you can go to any site that can check your public IP and location. Some popular ones are WhatIsMyIPaddress.com, IPinfo.io and YouGetSignal.com. The last one is a fantastic suit of tools that is quite useful when you are self-hosting public web services.
To check DNS leak, go to DNSleakTest.com and perform an extended test. A DNS leak occurs when your VPN fails to route DNS requests through its secure tunnel, exposing your browsing activity to your Internet Service Provider (ISP) or other third parties. Normally, a VPN should prevent DNS requests from being visible, but if there’s a leak, your DNS requests can still be tracked. This compromises your privacy even when using a VPN. Since our setup is custom, NordVPN cannot enforce its usual safeguards. Which is why I have explicitly configured DNS in the Docker Exec config to prevent this from hapenning. If everything is fine, your DNS leak test should only list NordVPN servers and nothing else. If there is a DNS leak you would see DNS servers from wherever your Kasm server is hosted.
This was fun! This setup is pretty tight with no room for leaks. If you have any suggestions or questions, feel free to leave a comment. I’ll see you in the next post!
Thanks a bunch for sharing this with all of us you actually recognize what you are talking approximately! Bookmarked. Please also consult with my site =). We may have a link exchange contract among us!
Needed to draft you the tiny note to finally thank you very much over again just for the incredible techniques you’ve shown above. This is wonderfully generous with you to offer without restraint just what many people would have sold for an e book to help with making some money for themselves, most importantly seeing that you might have done it in case you desired. Those smart ideas in addition acted like a great way to understand that someone else have the same passion just as my own to learn a good deal more when it comes to this matter. I think there are thousands of more enjoyable occasions ahead for many who browse through your site.