Have you ever needed to quickly install an application just to test it out? Or have you ever needed to quickly spin up an OS image to test it out or to perform a one-off task? If you are in IT operations or software development, you know what I am talking about. Kasm Workspaces is a lifesaver for this scenario. You can have lots of applications and even fully-fledged desktop OSs that you can access right from your web browser and use as sandboxes.
Kasm Workspaces is essentially a container streaming platform. It runs applications and OSs you want as docker containers and “streams” them via the web interface to your web browser. Since everything is streamed through HTTPS, you do not need to open additional ports on your server. Just the standard 443 is sufficient. It’s a brilliant solution if you ask me. It has far more uses than just sandboxes on demand. Among other things, it can be used as a training platform or even as a VDI solution in an enterprise environment. Kasm Workspaces is an open-source solution that has a paid version for businesses. As Kasm Workspaces are essentially Docker containers, I may use both terms interchangeably throughout this article.
Kasm Workspaces Installation
I am using an Oracle Cloud compute instance as my host server because their free tier is unbelievably generous. But you can use any other cloud provider such as AWS, Azure, or Linode (just be careful about the cost). Or you can even a physical machine with sufficient resources. My choice of OS here is Ubuntu. Let’s get into it.
Go to /tmp folder to download the installation files
cd /tmp
Download the installation file using curl
curl -O https://kasm-static-content.s3.amazonaws.com/kasm_release_1.16.1.98d6fa.tar.gz
Extract the file and run the installation script
tar -xf kasm_release_1.16.1.98d6fa.tar.gz sudo bash kasm_release/install.sh
sudo bash kasm_release/install.sh
Refer to the official Kasm Workspaces documentation to get the latest command with the file name of the latest release via Single Server Installation — Kasm 1.16.1 documentation. At the end of the installation, the admin credentials and user credentials will be displayed. Copy-paste them to a notepad.
Kasm Workspaces 101
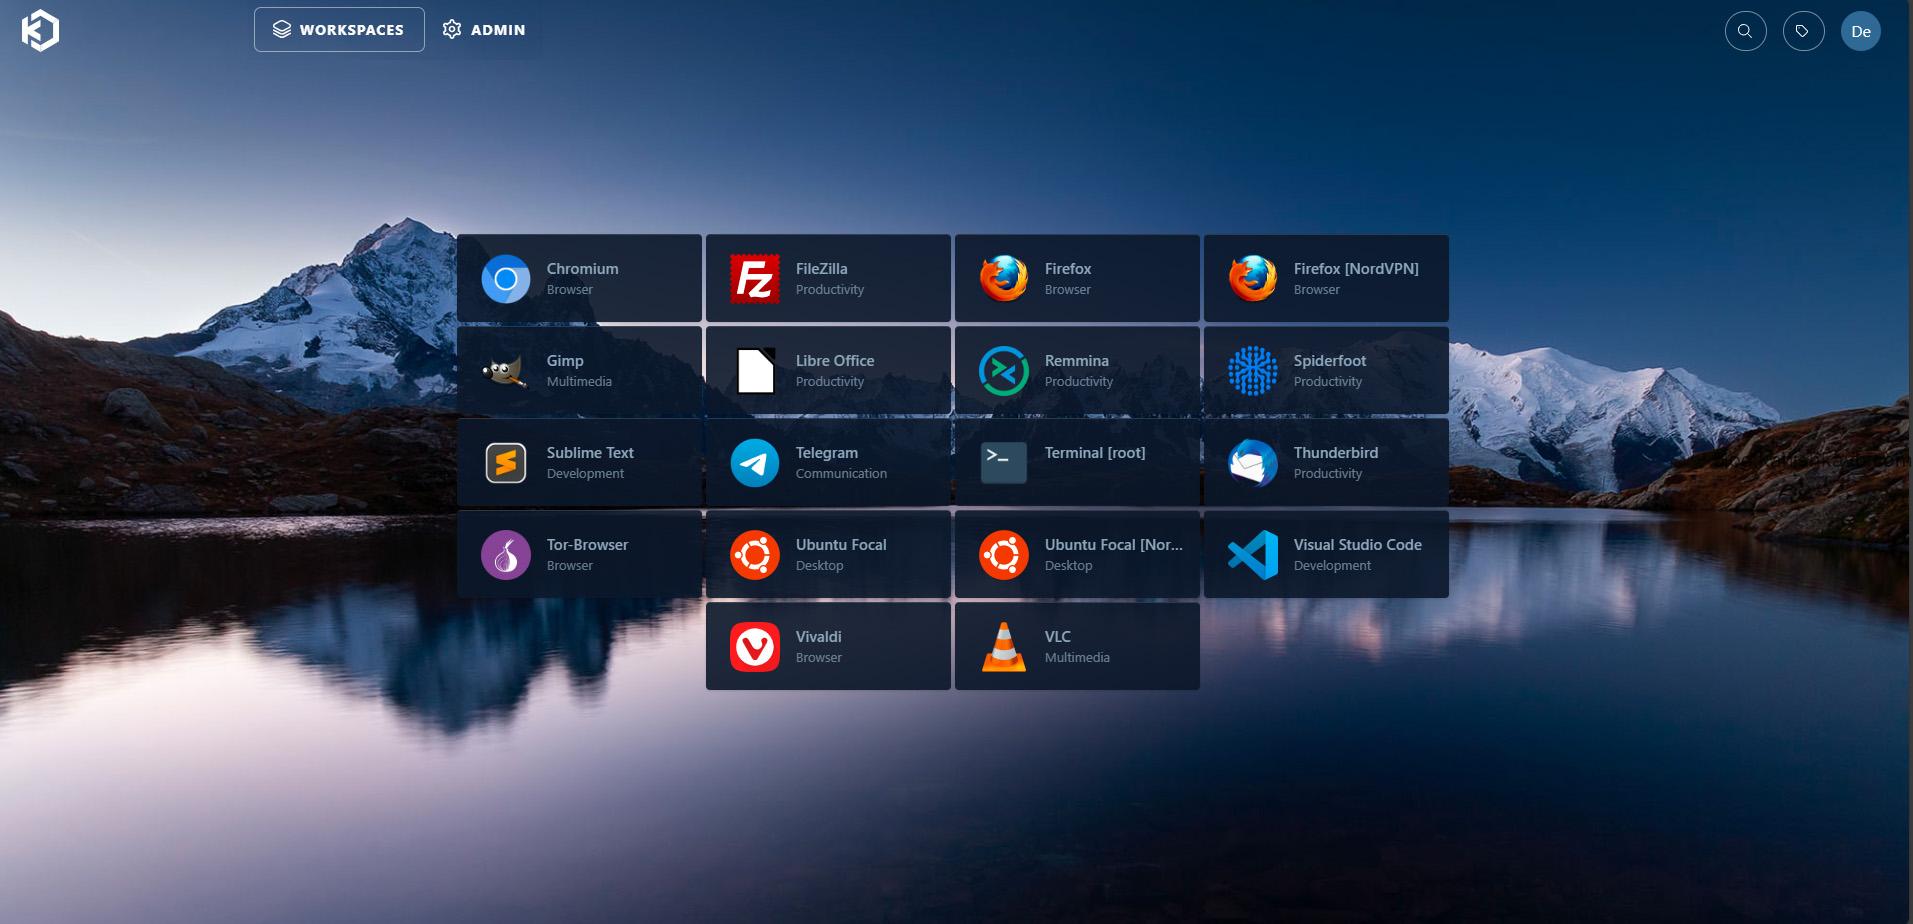
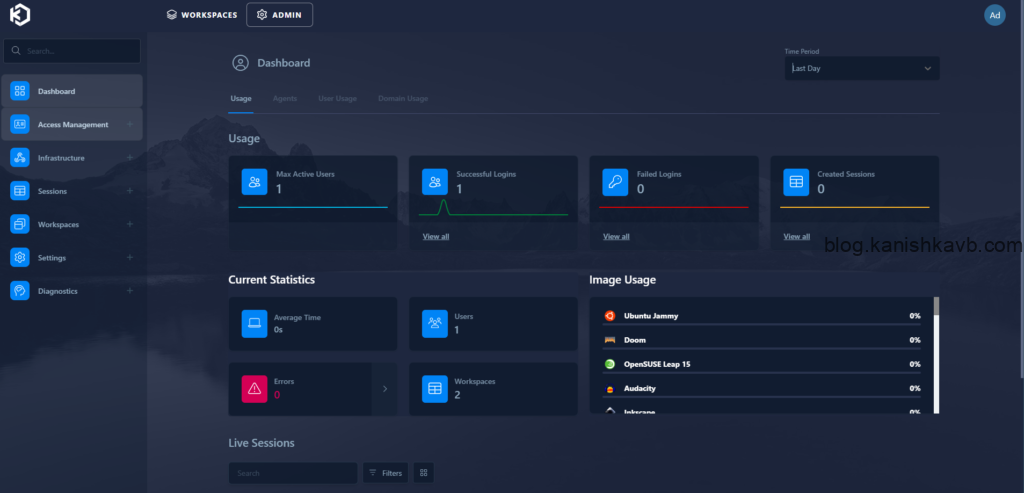
Type the IP address or the FQDN of your host server and you should get the Kasm login page (https://yourServerIPOrFQDN). Type the admin username and password you noted down earlier and log in. First, you will see the admin dashboard. Click on “Workspaces” to view the currently installed workspaces.


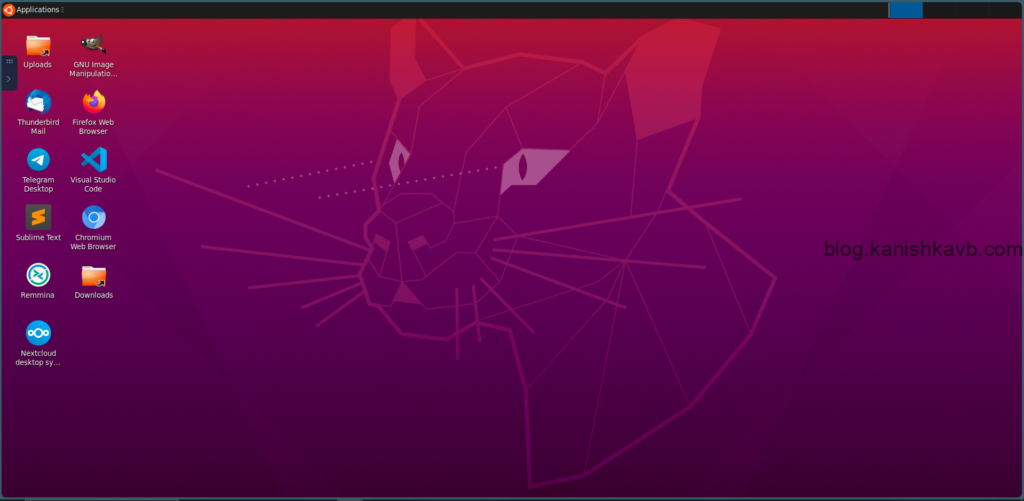
You can simply click on any workspace you like and then you can use it right within the web browser. For example, if you click on “Ubuntu Focal”, in the background, Kasm will spin up a Docker container with Ubuntu Focal image and stream it right to your browser. It ‘feels’ similar to when connected to a remote computer. Now you can use this workspace right within the web browser. Clipboard is transient by default which makes things much easier.
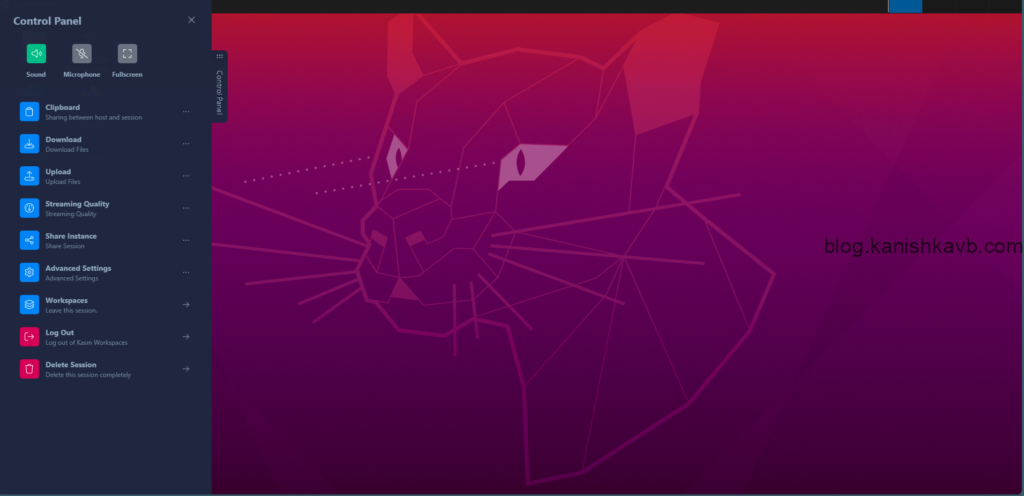
Using the side panel on the left, you can configure, the clipboard, sounds, file uploads/downloads, etc. Using uploads and download options, you can transfer files between your local machine and the Kasm workspace. If you click log out, the workspace will remain intact, and you can resume later. If you click on Delete session, the session (Docker container) will be deleted.
Each workspace has a default timeout period of 60 minutes. If you leave a workspace running, it will be automatically destroyed (session deleted) after 60 minutes along with any data you may had on that workspace. Each time you log into the workspace, the timer resets. This is crucial to understand. As these workspaces are Docker containers, they are ephemeral in nature. Every time you remove a running workspace (Docker container), all data of that session is wiped clean. Also, it cannot make changes to the host by default (sandboxed). This is why this platform makes a safe playground for testing things out. Because no matter what you do in the workspace, all that is contained to that workspace and you can reset it any time you want. And obviously, it has no effect on your local machine or the Kasm host server.
Taking a look at under the hood
The Kasm Workspaces server consists of three main components: Kasm (Docker) Agent, Kasm Manager, and Kasm Database. The Agent is responsible for running and managing the Docker containers that host the workspace sessions. The Manager handles the orchestration of workspace deployments, user authentication, and system configurations. The Database stores all persistent data, including user accounts, configurations, and session logs. If the Kasm Workspace server is a car, the Workspaces running with beautiful GUIs, are the exterior of the car. Under the hood, the engine that makes the car work is Docker. Let’s take a look.
First, SSH into the host server and type,
docker ps

Now you can see all the containers running. Some of these are service containers that are essential for Kasm e.g. Kasm_proxy Kasm_db, etc. Among them, you should see your active workspaces as well. For those who are familiar with Docker, this shouldn’t need further explanation. Essentially, you can manage workspaces directly from Docker as well. This is especially useful when troubleshooting.
Now that we have a basic understanding on how Kasm works, let’s tweak it a little bit.
Global settings
There are a multitude of settings in Kasm that allow you to customize it to your needs. Some of them are Global – which means they affect the whole system. Some of them are workspace specific – which as the name implies only effect a specific workspace. Let’s take a look at a few global settings first.
Docker Agent
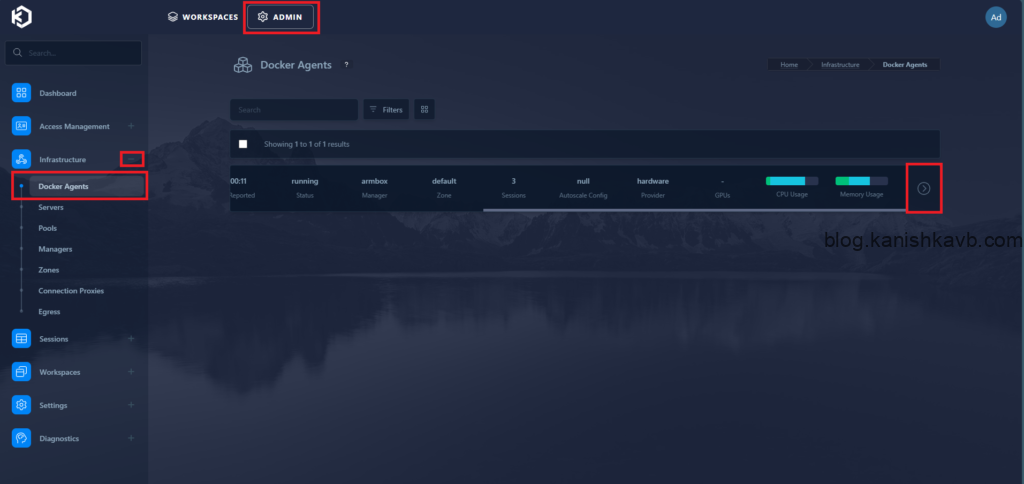
As explained above, the Agent is responsible for running and managing the Docker containers that host the workspace sessions this includes resource allocation. If you navigate to Admin > Infrastructure > Docker Agents, you can see the CPU and memory utilization (overall utilization by all workspaces + underlying services). Using the edit option, you can tweak this – especially if you are running other services on the same server.
Workspace session timeout
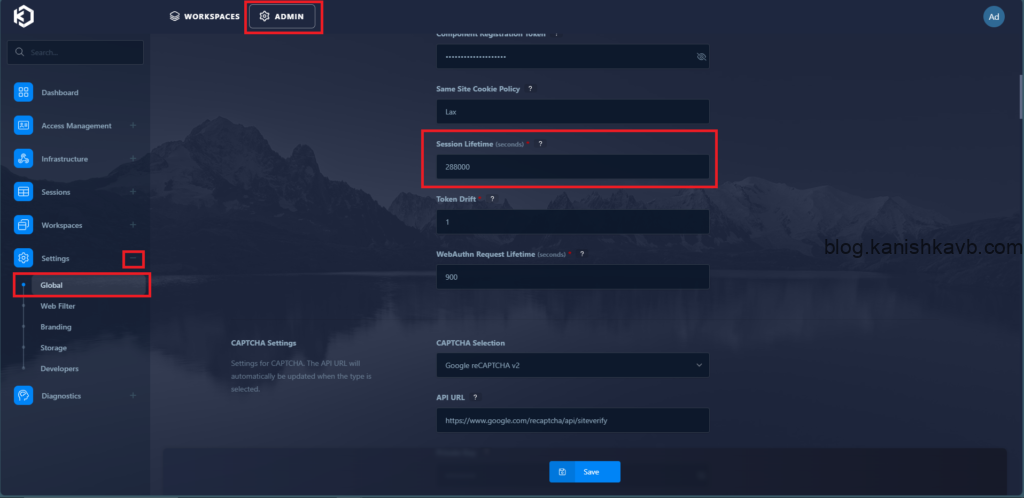
In my docker ps screenshot, you might’ve noticed that I have workspaces running for days – way beyond the default 60 minute timeout. This is because I have increased the default timeout. Here’s how you can do it. Go to Admin > Settings > Global > Session Lifetime (seconds). Type the timeout you need in seconds.
Registry
As you may know, containers are spun up from container images. As an example, a Docker container is spun up using a Docker image that contains everything that the container needs to run. These containers are usually stored in container registries. Docker Hub is a popular one. However, you can’t just install a container image from Docker hub on Kasm. The reason is that Kasm require some special settings that allows the containers to integrate and function with Kasm. Therefore, Kasm has its own registry called Kasmweb – Kasm Workspaces.
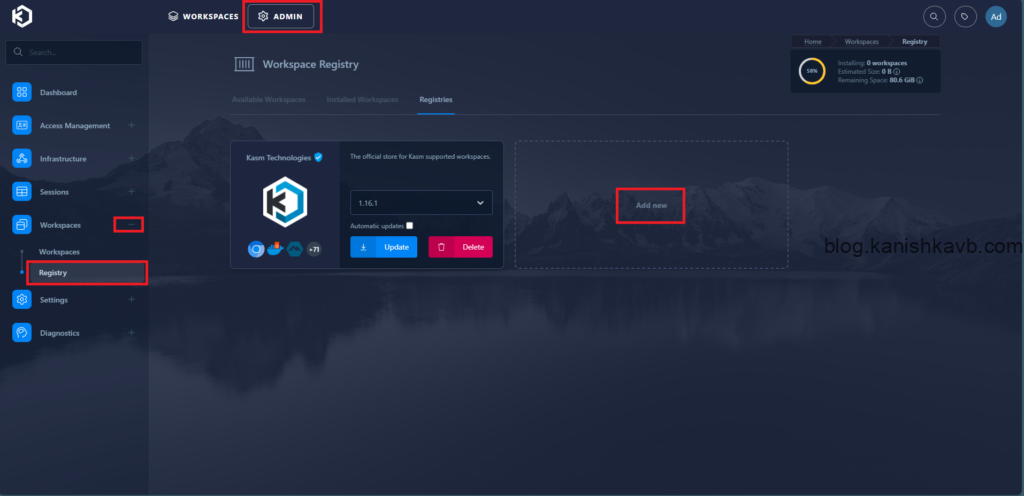
Apart from the official Kasm container registry, you can add other third-party registries to Kasm. An example would be linuxserver.io – Kasm Workspaces. If you go to Admin > Workspaces > Registry > Registries, you can see the option to add more registries. Just track about your storage consumption.
Workspace settings
As I mentioned above, there are a wide variety of options at the container level that you can customize. I will introduce a few settings that I find useful.
Resource allocation
By default, there is a set amount of CPU and memory allocated for all workspaces. If you have a resource-intensive task running on a particular container, this might be an issue. Assuming you have enough resources to spare on the host server, you can increase (or decrease) the resource allocation per workspace.
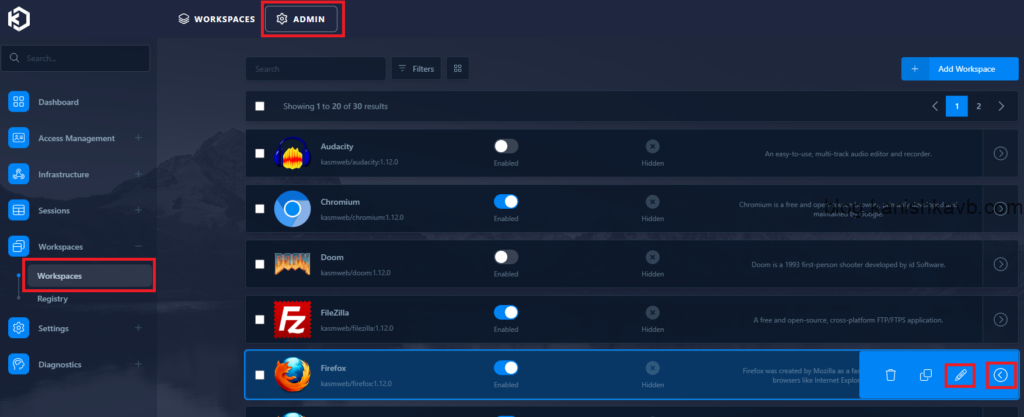
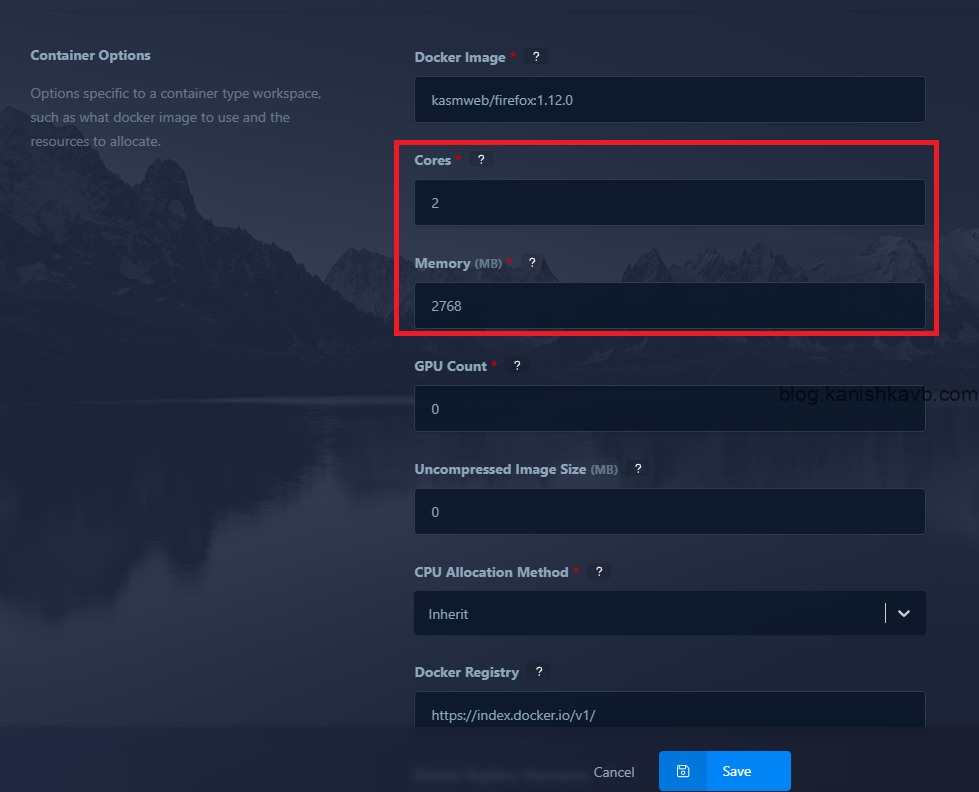
- Go to Admin > Workspaces > Workspaces. Then select the edit option on the desired workspace.
- Scroll down to the Docker Image section and adjust the CPU, memory, and if applicable GPU settings. You can use the concept of overprovisioning here if you are not running a lot of containers at once, but if you do, make sure that the total of resources allocated to containers (that will run simultaneously) does not go beyond what’s available on the host server.
Persistent volumes
If you have worked with Docker or any other containerization platform, you are most likely familiar with the concept of persistent volumes. Even though containers are made to be ephemeral in nature by default, there are scenarios in which you want to retain the data that’s on the container even after the container is destroyed. As an example, if you are using a set of containers to transform data, you want that transformed data to persist and accessible outside the containers.
You can accomplish this by essentially mapping a directory from the host server (Kasm also supports cloud storage now) to the Docker container.
Create a directory and grant appropriate permissions
sudo mkdir -p /mnt/persistentdata
sudo chown -R 1000:1000 /mnt/persistentdata/
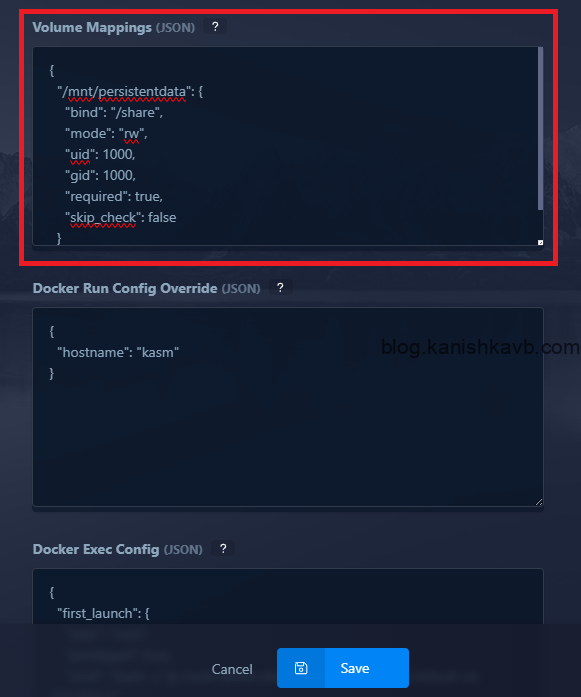
Now go to the same settings path as we did in workspace resource allocation which is Admin > Workspaces > Workspaces. Select the desired workspace and go to edit. Scroll down to Volume Mapping (JSON) and paste the following and save. Make sure to replace the directory path with your own directory path.
{
    "/mnt/persistentdata": {
      "bind": "/share",
      "mode": "rw",
      "uid": 1000,
      "gid": 1000,
      "required": true,
      "skip_check": false
    }
}
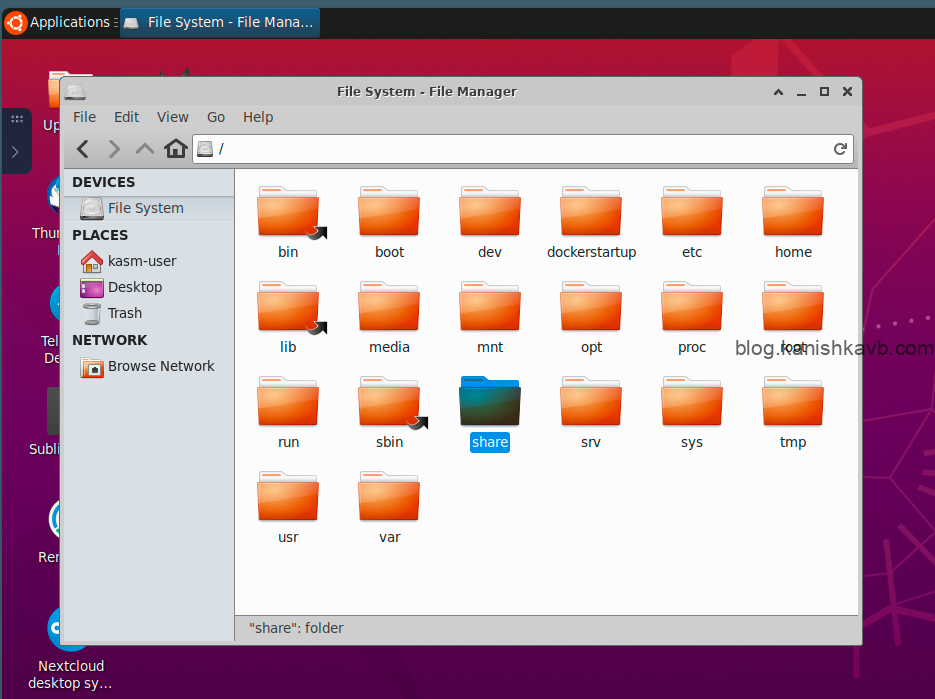
Now the directory of the host server is mapped to the /share directory inside the workspace. If you start the workspace (if it is already running, it must be deleted and started again), and navigate to /share, you can access the persistent volume. You can verify this by creating a file from the workspace and checking it from the host server or vise-versa. All you now need to do is configure your application to save the files you want to retain to /share folder in the workspace.
Root access
Kasm uses non-root users in its workspace containers by default, and sudo is disabled to prevent unauthorized administrative actions. This is to enhance security. This ensures that users cannot modify the container environment, escalate privileges, or compromise the underlying host system. Kasm workspaces are meant to be isolated environments. Kasm as a whole is meant to be run as a multi-user system. Therefore, not giving root access to users is best practice.
That being said, if you are using this in a non-production environment, or in a very specific niche case where you really need to have root access. You can accomplish it by overriding the Docker run configuration in workspace settings.
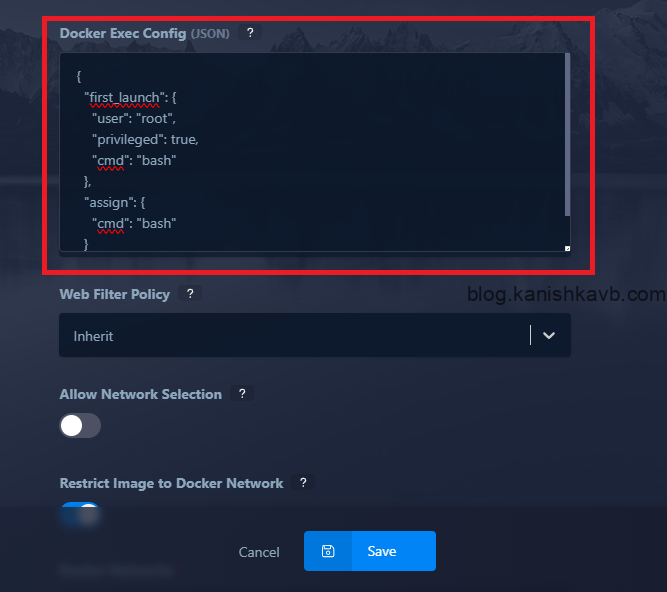
Navigate to the same setting path as before – Admin > Workspaces > Workspaces. Select the desired workspace and go to edit. Scroll down to Docker Run Config Override (JSON), paste the following, and save.
{
    "hostname": "kasm",
    "user": "root",
    "environment": {
        "TERMINAL_ARGS": "--fullscreen --hide-borders --hide-menubar --zoom=-1 --hide-scrollbar"
     }
}
I’m currently working on some exciting Kasm Workspaces customizations that can make our tech lives easier. I’ll be sharing them soon in the usual detailed tutorial format. Stay tuned!
[…] guide on what it is and how to set it up from scratch. Please go through it using this link here. Once your Kasm Workspace Server is up and running, you can continue this […]
[…] First post – A comprehensive guide on installing and setting up Kasm Workspaces to fit your needs. […]