This is a long time coming. I have been running my own personalized streaming service at home for quite a few years, and it has been such fun! I had this plan for a long time and after a lot of thinking, experimenting, and research, I put together this idea to run Plex media server on a headless Raspberry Pi 4 and to create my own “‘NAS” using snapRAID using a bunch of laptop hard drives I had lying around, SATA-USB caddies, and a USB 3.0 hub. This wasn’t going to be easy, but I knew I was going to have fun and learn a ton.
I am writing this in the form of a guide, and I will be taking a bottom-up approach. This means I will be discussing the hardware aspect first then the disk array (SnapRAID) setup, automation of the disk array, and finally installing and configuring the Plex media server. I have put subheadings so if you are interested in only a particular part, you can skip right to that.
Disclaimer: This guide focuses solely on the technical aspects of building a personal media server and is intended for educational purposes only. I do not encourage or condone piracy in any shape or form. Please ensure compliance with local laws and regulations regarding media content and usage.
HARDWARE SETUP
I wanted to do a very affordable setup. These are the hardware I used,
- Raspberry Pi 4 model B with original UK PSU
- Micro SD card (size depends on the size of your content library. As a start, I put a 32 GB class 10 one)
- Micro SD card reader
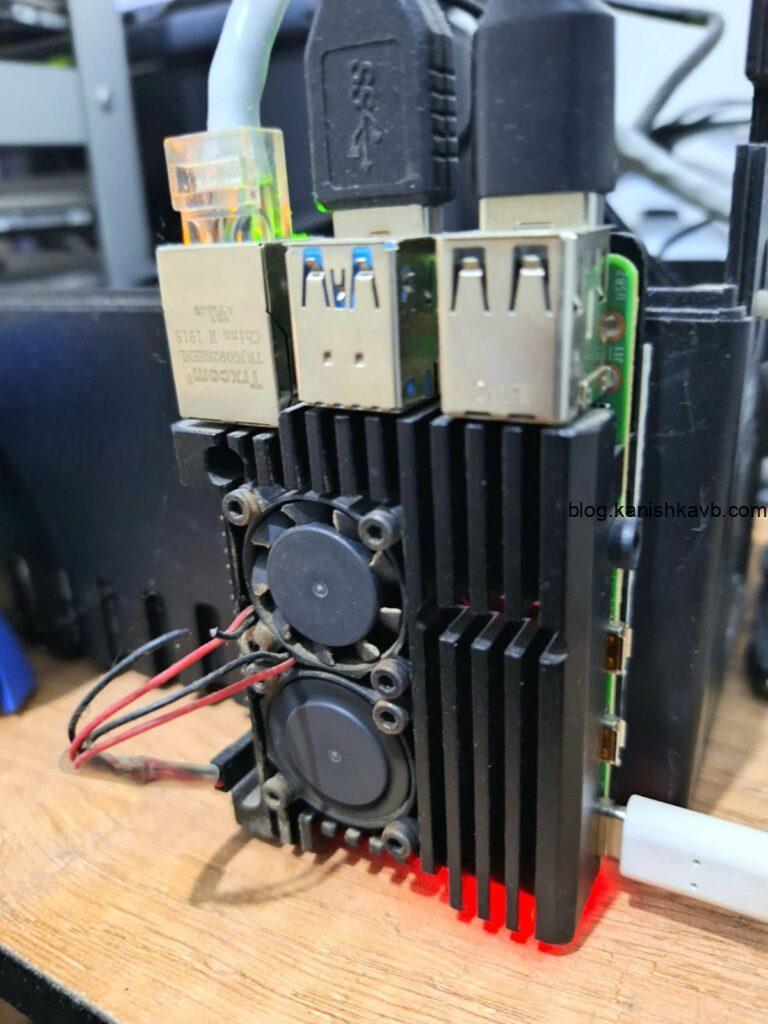
- An aluminum casing (which doubled as a heat sink) with two cooling fans for the Pi
- Laptop hard disk drives and SATA-USB converters (or portable HDDs)
- 7-port powered USB hub
- 6 SATA to USB 3.0 converters for the hard drives
- A custom-made bay for the hard drives and the Pi (optional)
- 650VA UPS (optional but highly recommended)
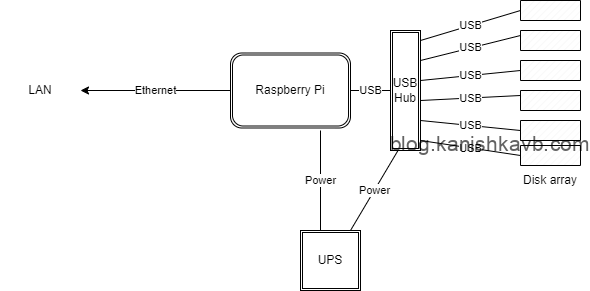
Here’s a logical diagram of my setup,
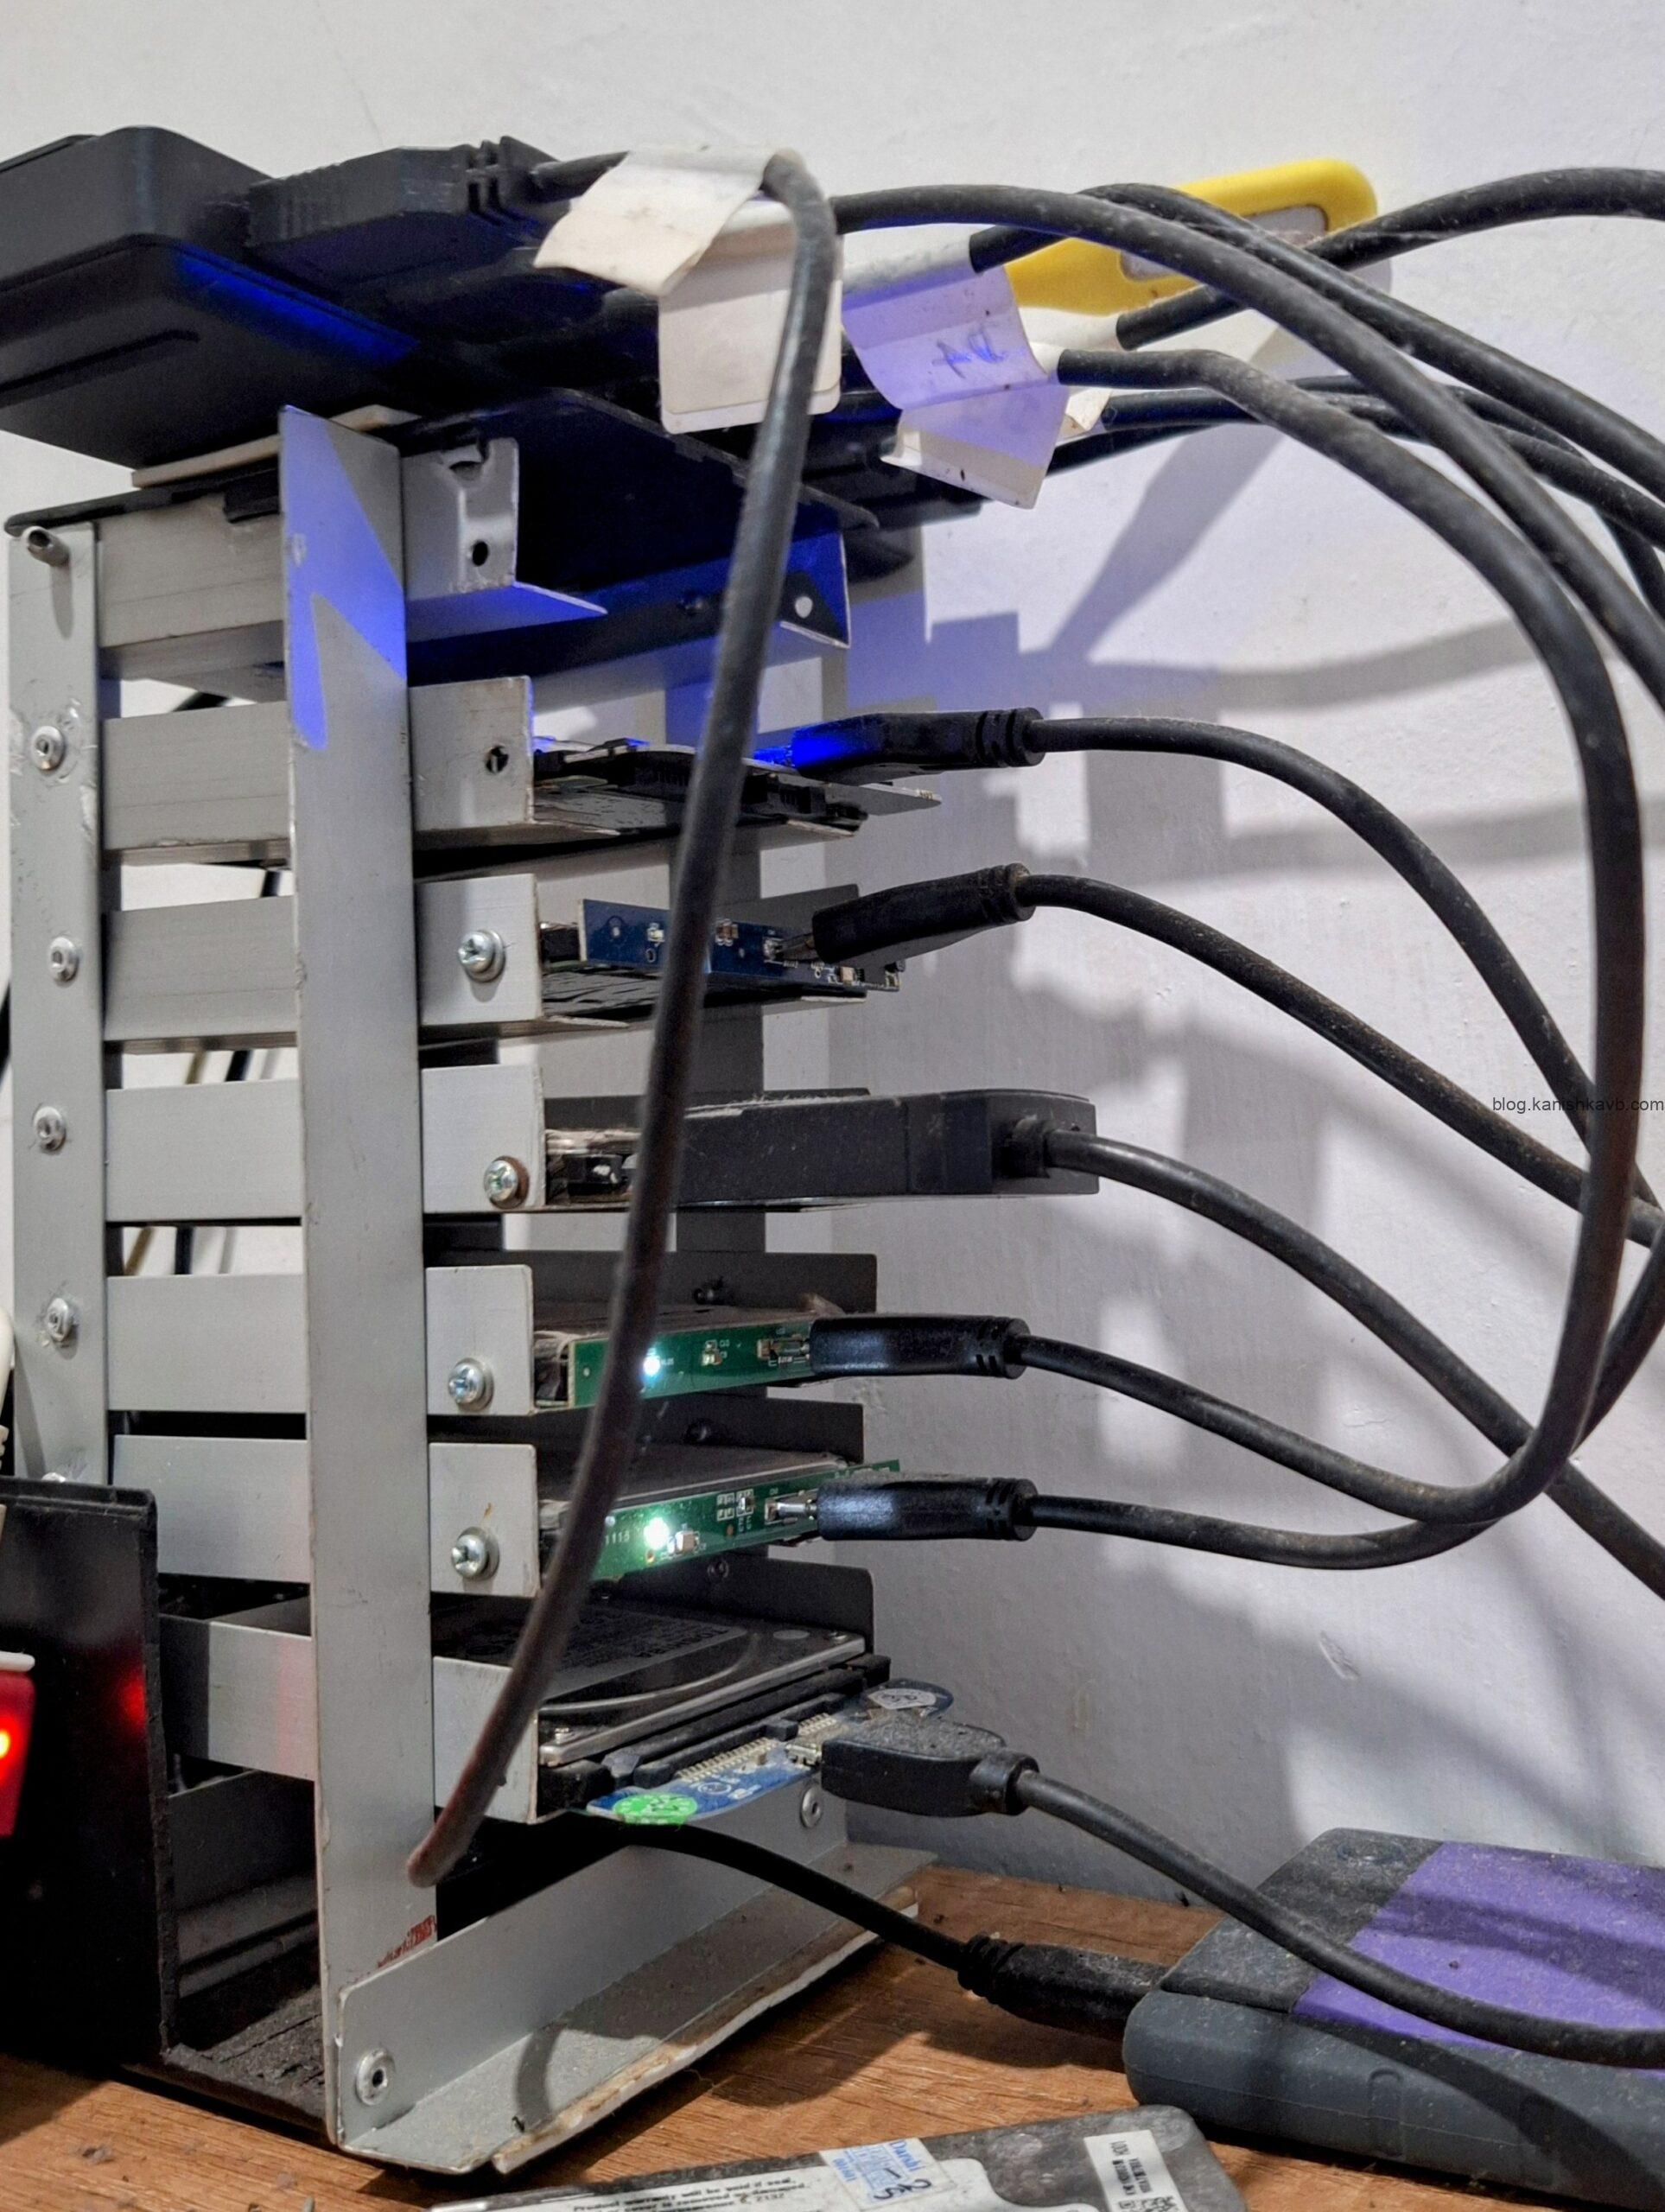
This is how it actually looks,
I know it looks a bit janky but the look kind of grew on me after a while. Besides, since it recides in a descrete corner of my house, I wasn’t too worried about asthetics.
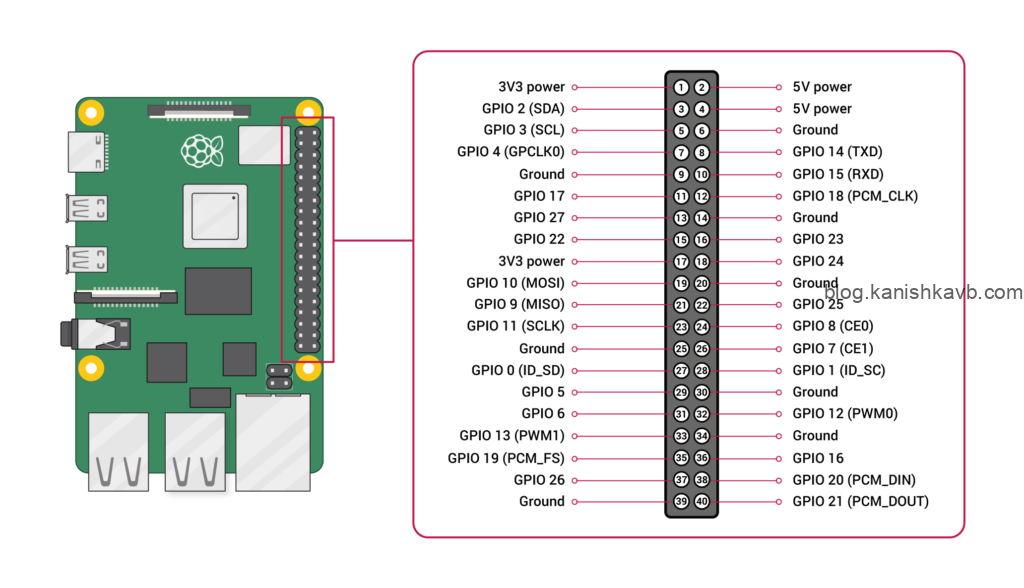
Let’s get to it. First, assemble the RPI case and the fans (refer to the following diagram to see which GPIO pins you should use for fans). Then, plug in all HDDs to the USB 3.0 hub and connect the hub to a USB 3.0 port of RPI. Power the RPI through the UPS.
When you select the HDDs, there are a few things you need to consider,
- You can use disks with different sizes, RPMs, and types.
- As a general best practice in snapRAID, you should have 1 dedicated parity disk for every 7 data disks. This gives you fault tolerance from 1 disk failure. If you want more tolerance, you can increase the parity disks.
- The size of the parity disk must be the same as the biggest data disk or bigger.
SOFTWARE SETUP
Alright, let’s get things running. First, plug the micro SD card into a PC using the card reader. Now we can flash the SD card with Raspberry Pi OS. I chose Raspberry Pi OS Lite because it is purpose-made for RPI and it is lightweight. However, remember that this is a headless OS so you will have no GUI to manage the OS. I personally prefer to use the Linux shell because it’s fun and lightweight. You can use another OS too such as Ubuntu Server but if you do, make sure you change the commands and paths accordingly when following these instructions.
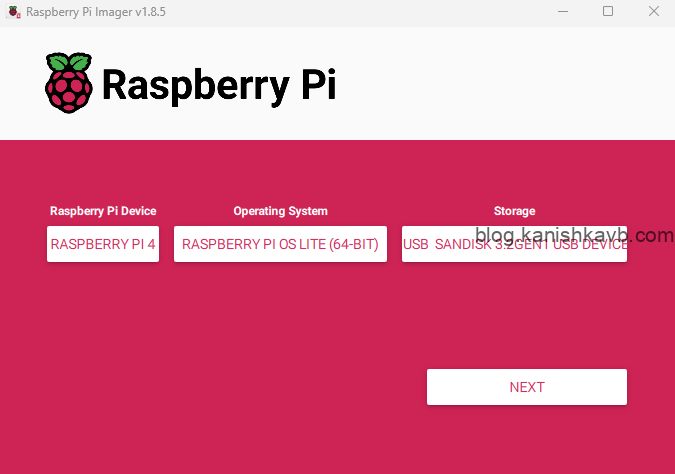
The easiest way to flash your SD card is via “Raspberry Pi Imager”. It has an all-in-one tool where you can select, download the desired OS, customize the settings and flash the SD card. Once you install Raspberry Pi Imager, select the following options and go “Next”,
- Raspberry Pi Device (select your RPI model – in my case, it is RPI 4 B)
- Operating System (select the OS you want – in my case, it is Raspberry Pi OS Lite 64bit)
- Storage (select your SD card)
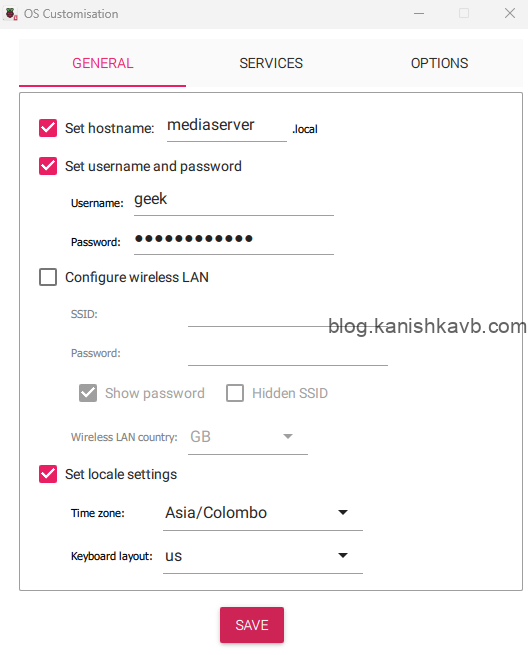
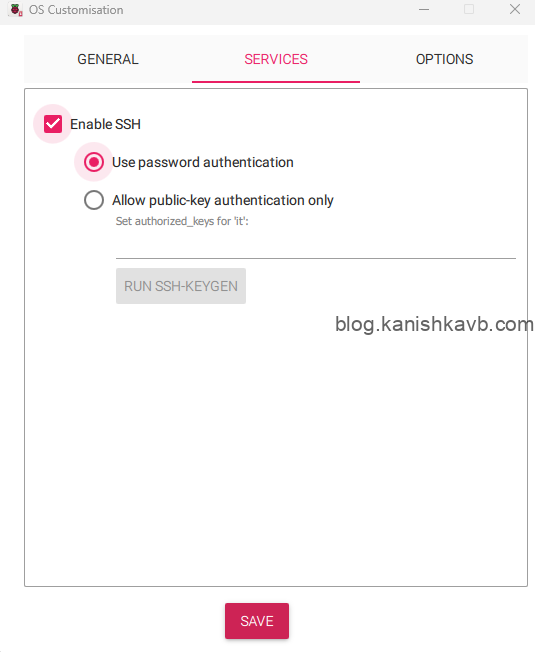
Now, set the following settings. The only mandatory setting is to enable SSH server. However, setting the rest of the things will make things easier and faster for you during the initial setup,
- Set hostname to something you want
- Set username and password.
- Set timezone
- Enable SSH server
Now, put the micro SD card into the RPI and power it up. If possible, plug in a monitor to one of the mini HDMI ports of the RPI (using an adapter) so you can obtain the IP address of the RPI. Or if you want to go with a fully headless approach from the get-go, obtain the IP address the RPI from the DHCP server in your network (most often this is your ISP router). Once you have the IP address, you can log into the RPI and do the initial configuration,
Open an SSH client such as Putty and put in the IP address of the RPI to log in. Enter the credentials once prompted.
Once you are in, configure a static IP address using
raspi-config
Reboot the RPI using sudo reboot command and perform an update/upgrade of the OS packages and the repos,
sudo apt update && upgrade
Once completed, we can start installing the packages we need. Let’s start with the storage stolution. What we are going to do is, we are going to install and configure snapRAID so we can generate parity for our data and recover from potential disk failures and accidental deletions. Then we will ‘merge’ all data disks with MergerFS into a single storage pool. Then we will present that as the storage to the Plex media server.
MergerFS
Let’s get MergerFS installed,
sudo apt install mergerfs fuse -y
Create the folders inside /mnt to be used as the mount points for the storage pool drives,
sudo mkdir /mnt/plexstorage
sudo mkdir /mnt/parity1
sudo mkdir /mnt/disk1
sudo mkdir /mnt/disk2
sudo mkdir /mnt/disk3
sudo mkdir /mnt/disk4
sudo mkdir /mnt/disk5
Now you need to identify the HDDs. First, make sure all HDDs are unplugged from the USB hub. Then make a note of the output of the following command. These are the device IDs of the disk drives plugged into the RPI.
ls /dev/disk/by-id
Now, plug in the parity disk you chose and run the above command again. Identify the device ID of the parity disk by comparing the current output with the previous one. Note it down (preferably on a notepad where you can copy-paste). It’ll be a good idea to mark the physical drive too.
Repeat the same process for each data drive. Once completed, you should be able to identify all drives physically and in the terminal (by its’ device ID). And you should have a list of all drives IDs. Now, plug in all the drives.
FSTAB
Now we need to make sure that the drives are being mounted automatically at startup. For that, we need to edit the fstab file.
Open the fstab file and add the drives as follows,
sudo nano /etc/fstab
fstab content (e.g.):
/dev/disk/by-id/ata-WDC_WD60…449UPL-part1 /mnt/parity1 ext4   defaults,nofail 0 0
/dev/disk/by-id/ata-WDC_WD60…V3-part1     /mnt/disk1   ext4   defaults,nofail 0 0
/dev/disk/by-id/ata-Hit…11YNG5SD3A-part1  /mnt/disk2   ntfs   defaults,nofail 0 0
/dev/disk/by-id/ata-WDC_WD…32015-part1    /mnt/disk3   ntfs   defaults,nofail 0 0
/dev/disk/by-id/ata-TOSH…3544DGKS-part1   /mnt/disk4   ntfs   defaults,nofail 0 0
/dev/disk/by-id/ata/-WDC_WD…074096-part1   /mnt/disk5   ntfs   defaults,nofail 0 0
/mnt/disk* /mnt/plexstorage fuse.mergerfs direct_io,defaults,allow_other,minfreespace=50G,fsname=mergerfs 0 0
Let’s understand the fstab file a little bit more, starting from the top, the first part is the path of the disk drive partition (ending with “part1”). Next is the mount point path. Then we have the file system of the drive. Then we have the default options with nofail enabled. This nofail option is quite important here (especially if you are running headless).
If any of the drives mentioned in the fstab fails, the system will not boot. It will halt and give you an error which you need direct terminal access if you want to bypass. By adding nofail option, you are telling the system to go ahead and boot even if this drive fails. Finally, the last line merges all of the drives to “plexstorage” and fuses it to appear like one big pool. Also, I have added minfreespace as 50 GB so the system will make sure each drive has a minimum of 50 GB free space. Make sure you substitue all values with your own.
Once that it done, connect all drives and mount all drives using the following command,
sudo mount -a
(you should not get any errors)
Check if the drives are mounted properly by running,
df -h
Done. Finally, reboot and make sure it mounts at startup as it should be.
SNAPRAID – INSTALLATION
Now that we have created our storage pool, we are ready to deploy SnapRAID. This is a static RAID solution specifically designed for scenarios where you have a lot of static data that rarely change. This is perfect for a media server. Why is that?
- It supports different drive types, different drive sizes with different file systems to be in the same array.
- It does not strip data and therefore, only the drives you are using will be active (less wear on drives).
- You can take a drive out of the array and plug it into any supported platform just like any other external drive.
- You can add drives with existing data without having to reformat it.
- It supports data recovery. If you delete something and want to recover it, you can do so before the next Snync operation.
- If the worse-case scenario happens and you lose more drives than your array allows, you can still use read the data from the remaining drives.
- It has a built-in bit-rot-prevention mechanism called Scrub.
- You can dynamically increase or decrease fault tolerant by adding/removing parity drives.
Sounds perfect, right? Well, for this scenario I think it is. Because once we copy some media to the storage, it is mostly static. It just sits there and gets read. The only change would be if you delete it or move it. As I mentioned, snapRAID is a static parity system. It does not provide real-time parity. We need to manually run sync operation to generate parity. Ideally, you should run a sync each time you add new data. Or you can automate it using a script to run at a frequency you prefer. In my case, I have it running everyday at midnight. So the parity for the media I added during the day will be generated at night. Apart from sync, you also have scrub operation. This checks for data integrity and prevents bit rot. I have this running once every week.
Now, let’s get to the installation. We are going to compile and build a .deb package and install from there,
git clone https://github.com/IronicBadger/docker-snapraid.git
cd docker-snapraid/
chmod +x build.sh
./build.sh
cd build/
dpkg -i snapraid*.deb
Check the isntallation,
snapraid -V
Once the installation is completed, we need to configure snapRAID by editing snapraid.conf file in etc directory,
sudo nano /etc/snapraid.conf
#Example configuration for snapraid

#Defines the file to use as parity storage
#It must NOT be in a data disk
#Format: "parity FILE_PATH"
parity /mnt/parity1/snapraid.parity

#Defines the files to use as content list
#You can use multiple specification to store more copies
#You must have least one copy for each parity file plus one. Some more don't hurt
#They can be in the disks used for data, parity or boot,
#but each file must be in a different disk
#Format: "content FILE_PATH"
content /var/snapraid.content
content /mnt/disk1/.snapraid.content
content /mnt/disk2/.snapraid.content
content /mnt/disk3/.snapraid.content
content /mnt/disk4/.snapraid.content
content /mnt/disk5/.snapraid.content

#Defines the data disks to use
#The order is relevant for parity, do not change it
#Format: "disk DISK_NAME DISK_MOUNT_POINT"
disk d1 /mnt/disk1/
disk d2 /mnt/disk2/
disk d2 /mnt/disk3/
disk d2 /mnt/disk4/
disk d2 /mnt/disk5/
#Excludes hidden files and directories (uncomment to enable).
#nohidden

#Defines files and directories to exclude
#Remember that all the paths are relative at the mount points
#Format: "exclude FILE"
#Format: "exclude DIR/"
#Format: "exclude /PATH/FILE"
#Format: "exclude /PATH/DIR/"
Each data drive has a .snapraid.content file containing metadata of the files in that drive. Parity drive(s) have snapraid.parity file which is the actual parity calculated from data. Make sure you edit the “parity list, “content” list and “disk” list in the config file and list your drives correctly.
SNAPRAID – USAGE
Now we can run our first snapRAID sync. Depending on how much data you have, this can take a long time. You have two choices here – complete the rest of the setup now and run the sync later or take break, run the sync now and continue the setup later. Either way, if you are running the sync manually, I would recommend running it in a screen session. If you have not used it before, “screen” is a terminal multiplexer for Linux/Unix. It allows you to create, manage, and switch between multiple terminal sessions within a single window. It’s useful for running long processes, as it lets you disconnect and reconnect to sessions without interrupting them. Let’s run our first sync,
First let’s install screen,
sudo apt install screen -y
Now let’s create a new screen session named snapraid,
screen -S snapraid
Run the snapRIAD sync,
sudo snapraid sync
Now you can disconnect from the screen session by pressing Ctrl+A, Ctrl+D. To reconnect, you can use the following command,
screen -r snapraid
Once the sync is completed, we can move on.
SAMBA SERVER
The next step would be to create a Samba share so you can access your Plex storage within your home network. This is an optional step but highly recommended. In my case, I have the Plex storage as a Samba share mounted on my Windows / Linux machines on the network. I can easily copy files to and from my media server that way and also use it as a NAS for other data.
First, we need to install samba server,
sudo apt-get install samba samba-common-bin
And then we need to create a file share by editing the config file,
sudo nano /etc/samba/smb.conf
[PLEX_STORAGE]
path = /home/pi/shared
writeable=Yes
create mask=0777
directory mask=0777
public=no

security = user
Now, in my case I am going to use the default user “pi” for the samba share as well. Feel free to change it up as per your need.
Add your user for samba authentication,
sudo smbpasswd -a pi
Give the ownership of the shared location to your user,
chown -R pi /mnt/plexstorage
PLEX
Alright, now that all the underlying infrastructure is ready, we can finally install the Plex media server.
curl https://downloads.plex.tv/plex-keys/PlexSign.key | sudo apt-key add -
echo deb https://downloads.plex.tv/repo/deb public main | sudo tee /etc/apt/sources.list.d/plexmediaserver.list
sudo apt update
sudo apt install plexmediaserver
Done. Now, make sure you have a Plex account. You can create one via plex.tv if you don’t have one already. Then you can access your Plex installation via the browser by typing the IP address of your media server via port 32400. The URL would be http://YourIPaddress:32400/web. Now you should see the login screen. Log in with your Plex account.

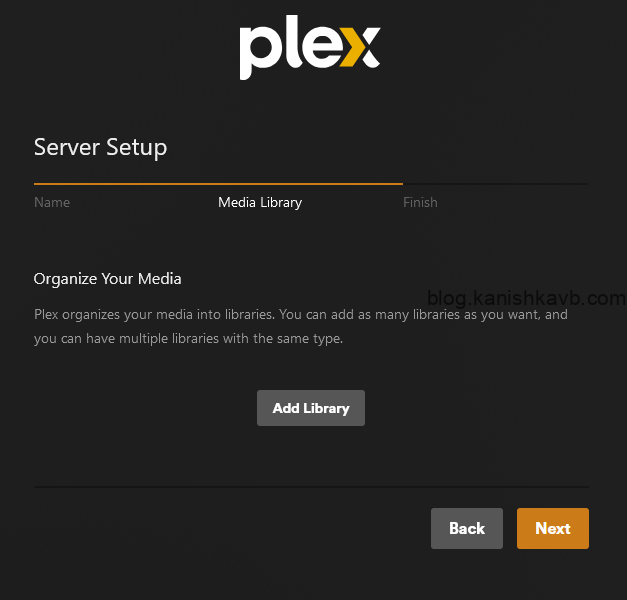
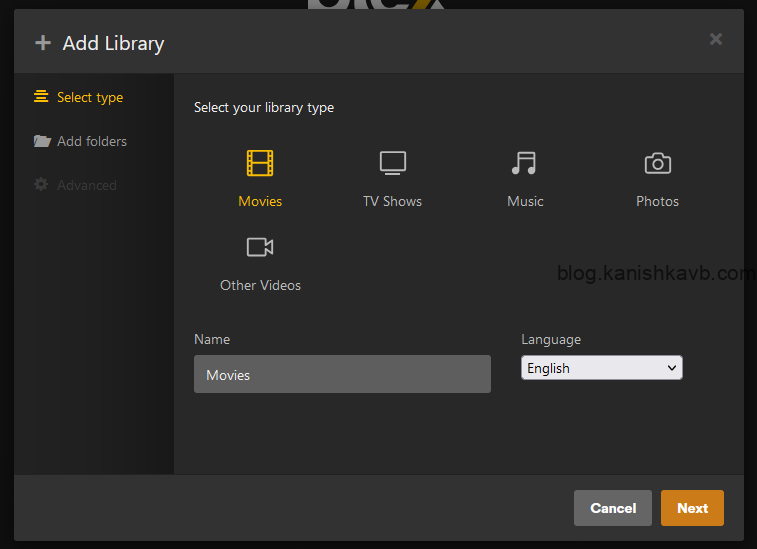
Next, you will see the initial wizard where you need to create the main libraries and point to the media location.
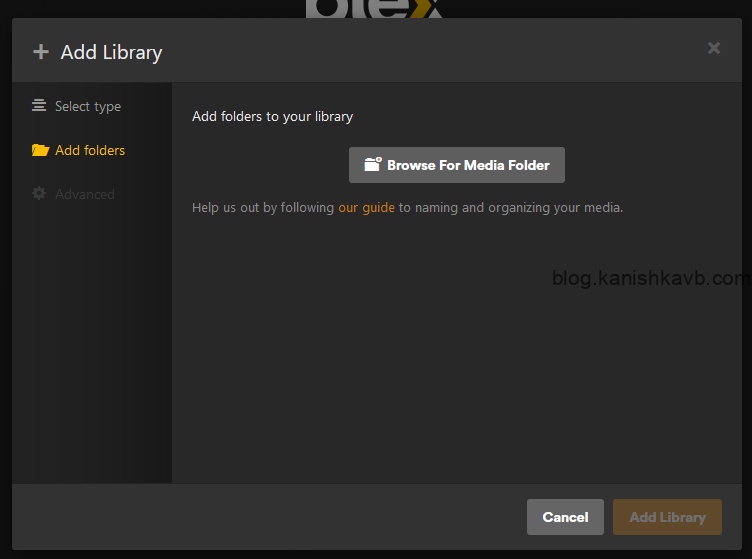
Once you select the location of your media and complete the wizard, Plex will start pulling metadata from the Internet and do its thing. Once done, you can stream your content. If you are using Windows devices, I would highly recommend installing the Plex desktop application instead of using the web interface. The reason is that when you use the Plex application, it often provides better playback performance and support for high-quality formats like 4K, HEVC, or DTS audio, as it can leverage local hardware acceleration more effectively and often by default support direct play (without the server having to do the transcoding).
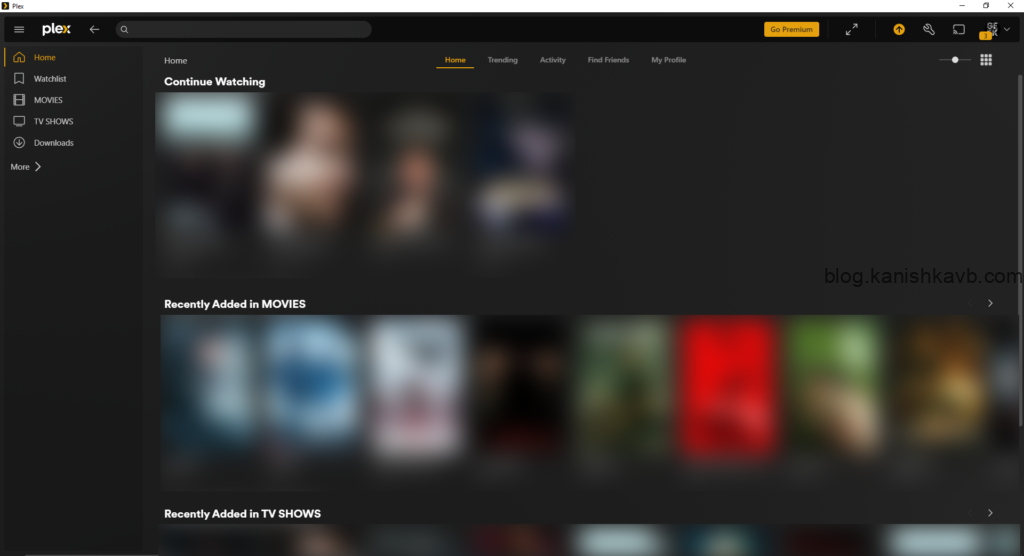
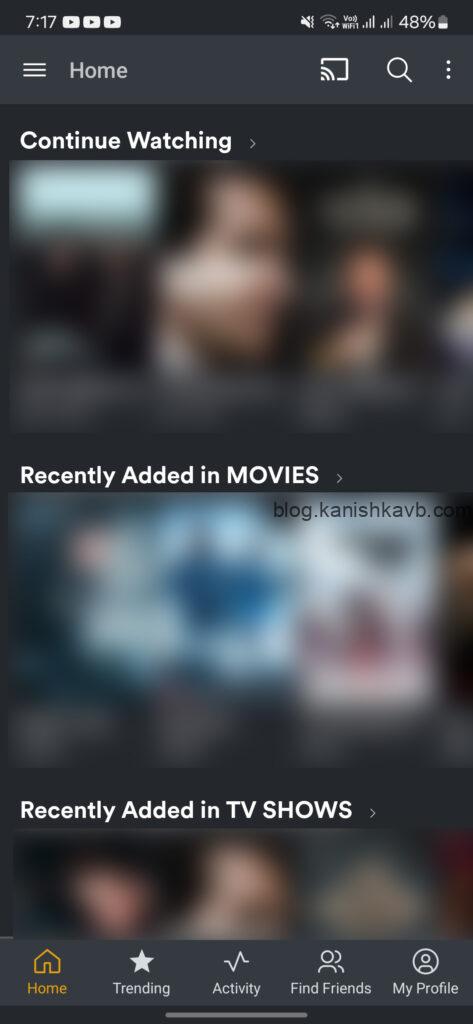
Here’s a look at the desktop application and mobile app connected to my server,
ADDITIONAL SETTINGS
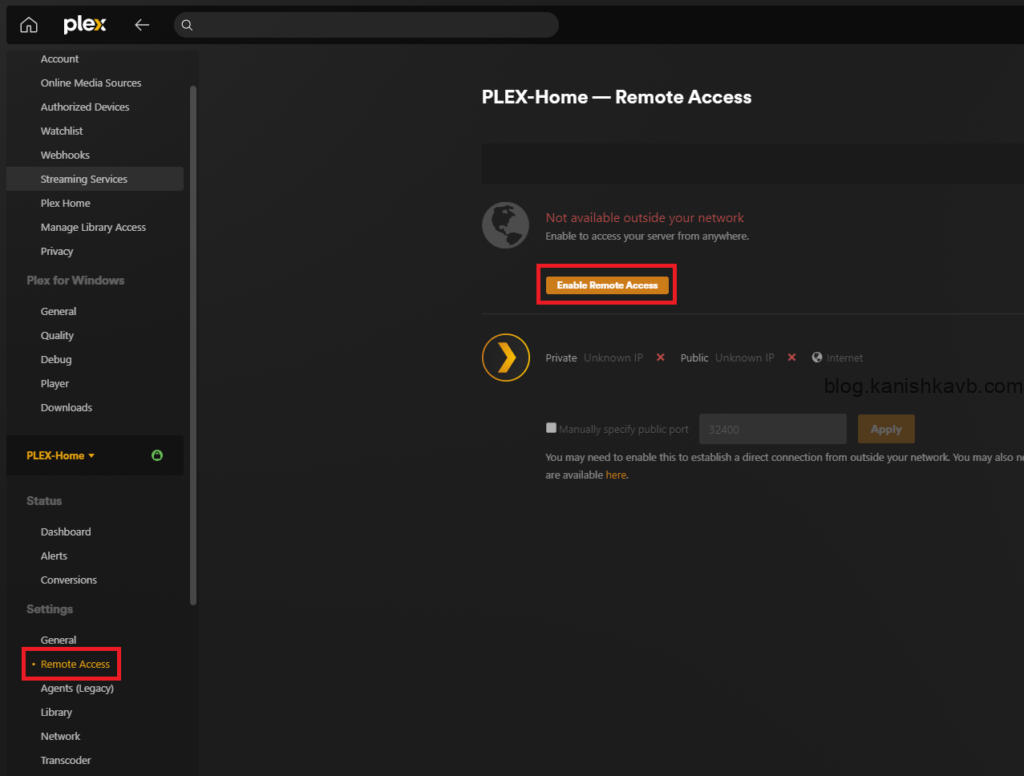
One of the cool features of Plex is remote access. You can access your Plex server and stream content from outside of your home network without having to put port forwarding in your ISP router or anything like that. You simply need to turn on the remote access option in settings and via app.plex.tv login, you can access your server. It works by creating a secure connection between your Plex server and your Plex account using their cloud infrastructure.
LIMITATIONS
This project was done mostly for enjoyment and learning purposes. I personally found it very useful for my media content and I still use it on a daily basis. That being said, this was done on a tight budget. There are a few limitations I want to point out here,
- Transcoding limitation – this RPI has a Quad-core Cortex-A72 ARM processor. Which is quite limited in terms of media transcode. It maxes out at 1080p single stream transcode. Since I am the only one at home using this and all my content are 1080p or 720p, it really was not a problem for me.
- Bottle neck on storage – obviously the USB hub is a bottle neck for the storage as all data must go through a single USB 3.0 interface. However, for this use case, it was not an issue as streaming a 1080p video doesn’t saturate a USB 3.0 interface. Further, at any given time only one disk will be read/written as per the snapRAID architecture. However, I still found that and the RPI to be a bottle neck when transferring media files across the network.
- Limited scalability – while you can always swap the drives for new ones, there are limited scaling options available in this setup if you are planning on using this long term.
While I was building this, some people asked me “Why?” Why would you put in the effort to build this when you can simply put your content on a portable drive or a NAS? To that, I said, “where’s the fun in that?” This was far more enjoyable than just buying an off-the-shelf NAS and putting Plex on it. Not to mention far less expensive. As with most DIY projects I do, the main goal here is to learn and have fun. This is a very distilled version of the journey I went through to build this. I did hit a lot of obstacles and had to experiment and read through countless forums to get around those obstacles. Each time I overcame something; I learned something and that is one of the greatest joys of my life.
Reading your piece felt like walking through a lush garden of ideas, each one blooming with vibrant insights that invited both contemplation and joy. Your words move with such effortless grace, and the way you bring together seemingly disparate thoughts into a cohesive whole is nothing short of magical. It’s a rare gift to make complex ideas feel so accessible, yet so profound.