AI is all the rage these days. I was quite intrigued by some of the stunning, mind-bending visuals done by AI image generators: future scenarios, alternative histories, or simply just art. MidJourney, Dall-E, and DeepDream are some of the names we all hear. I wanted to try some of it out for myself. There are lots of public-facing web interfaces available from these AI model’s creators, but they are often very limited, and you must pay to keep using it. So, I wondered if there was a way to host one and have a little fun.
That’s when Stable Diffusion came onto the scene (courtesy of Reddit). Stable Diffusion is an AI model that can generate images based on text prompts. As in, you can say what you want, and it will produce it. Basically, this type of diffusion model works by producing an initial image with just Gaussian noise and then subtracting that noise through a looping process so you will ideally lose all the noise leaving out the image you want. This mechanism is connected to a GPT model that can take your text prompts and ‘tell’ the image generator what it means so it knows how to predict the noise and therefore can subtract it. This is an oversimplification of the complex process of image generation, but it gives a general basic idea of how it works. It is available for free for anyone to download and run on Linux, Windows, and even MacBooks. But the catch is that you better have a powerful GPU to render the images and you must keep the PC running till the image is generated. Enter OCI. Oracle Cloud’s Ampere A1 has 4 cores in always free tier. You can create a computer instance with an Ampere A1 CPU and 24GB of RAM within always-free limitations. It will obviously not be as fast as a GPU render, but I just wanted to play around with it. It was quite challenging because Ampere is ARM-based. I tried so many different forks of Stable Diffusion but all of them have prerequisites that are not supported or not running well on ARM. Finally, I came across the “Easy Diffusion” fork which is designed to automate the whole Installation process including downloading the models from Hugging Face. That’s enough backstory, let’s get to it.
Now before we begin, I want to make it clear that this is not the easiest way to do it. You can make this much simpler and easier by using something like Google Colab or renting some GPU power. But where’s the fun in that? Besides, if you use any of those, you’ll have to pay for it and you will be limited. If you do this on OCI, it’s completely yours, with no bounds, and 100% free. Now this setup will be using CPU-only for image rendering. It will not be fast but it’s certainly enough to play around with it.
- First of all, you need to provide an A1.Flex compute instance on OCI. If this is the only instance you are going to have, you can go up to 4 OCPUs and 24 GB of RAM. Make sure to use Ubuntu 18.04 because the later versions have newer Python installed by default and it’s too much of a hassle to change it. It’s easier to simply get Ubuntu 18.04 from the start.
- Log into the OCI compute instance via SSH. Make sure to use the file name of your own SSH key file of the instance (instead of SSHkeyFileName.key) and the public IPv4 address (instead of X.X.X.X).
ssh -i SSHkeyFileName.keyubuntu@X.X.X.X - Install zip, unzip and download the Easy-Diffusion script from Installation | Stable Diffusion UI v2 (stable-diffusion-ui.github.io). You can go to the download section under Linux and copy the download link of the zip file to use it with wget command.
sudo apt install zip unzip python-pip -y
wget https://github.com/cmdr2/stable-diffusion-ui/releases/download/v2.5.24/Easy-Diffusion-Linux.zip - Unzip the Easy-Diffusion installation files and go into the resulting folder. Then run the start.sh script. This will take a while as it will install all necessary prerequisites and download the models from Hugging Face.
unzip Easy-Diffusion-Linux.zip
cd Easy-Diffusion-Linux/
bash start.sh - It says that you don’t need to take any additional steps because the script will install all necessary prerequisites which is true for the most part. But I did come across an error related few libraries. The script was unable to install it and things got halted at that point. If you get the same error, (“ImportError: libGL…”), install the ffmpg, libsm6 and libxext6 manually by following the steps below.
sudo apt update
sudo apt install ffmpeg libsm6 libxext6 -y - Once the above installation is completed successfully, run the start.sh script again.
bash start.sh - If everything went well, it should start the Web UI automatically and show you the following output in the terminal.
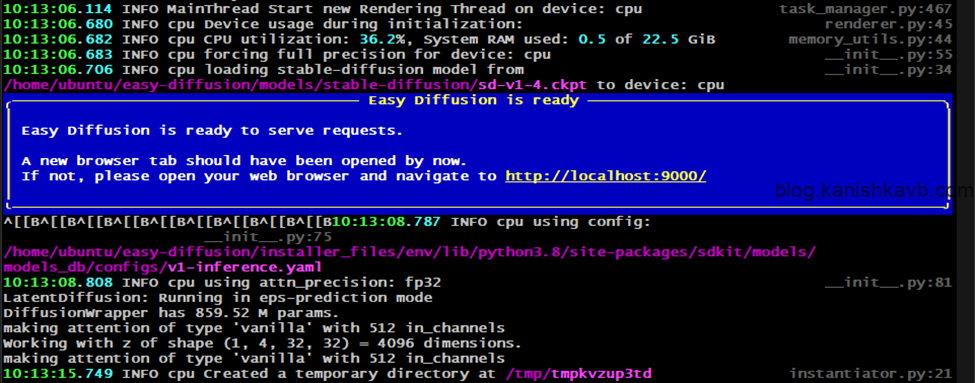
All good right? Well, not exactly. As you can see, now the installation is completed, and the web UI is running but it is running on http://localhost:9000 which means it is bound to the internal loopback network interface on port 9000. We cannot access it from our local machine because we are ‘talking’ to the instance via its public IPv4 address assigned by OCI Virtual Network. There are two things we need to do. First is to allow port 9000 on the OCI Virtual Network rules and in iptables inside the instance OS itself. Press Ctrl+C to stop the Stable Diffusion server and log out. Then follow these steps,
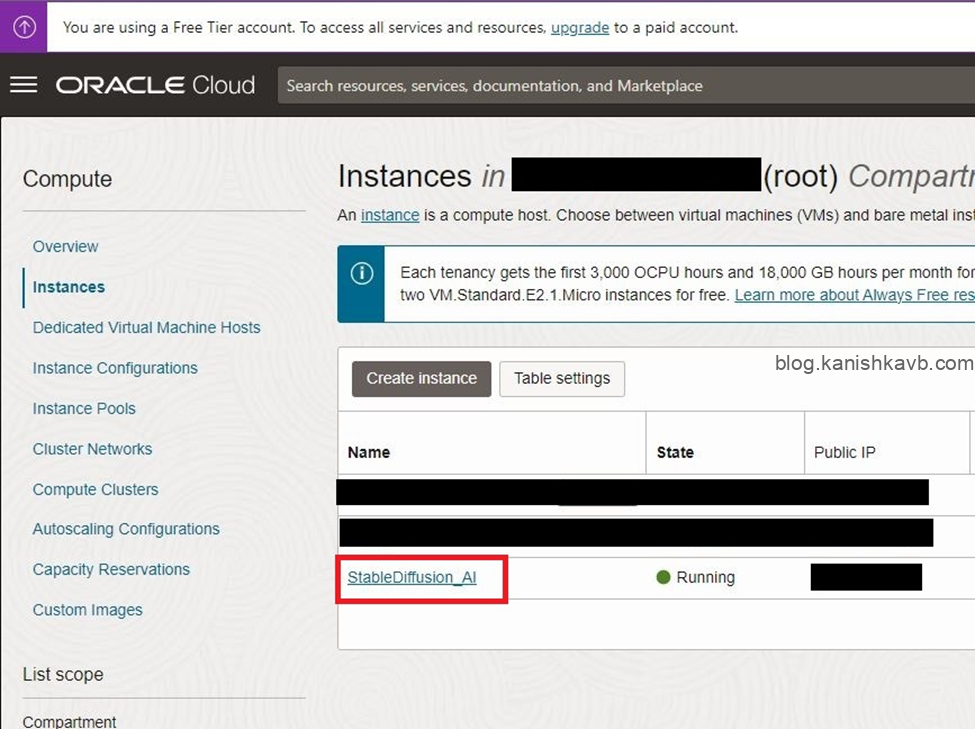
- Log into your OCI account and go to the Compute section. Click on the instance name of your Stable Diffusion server.
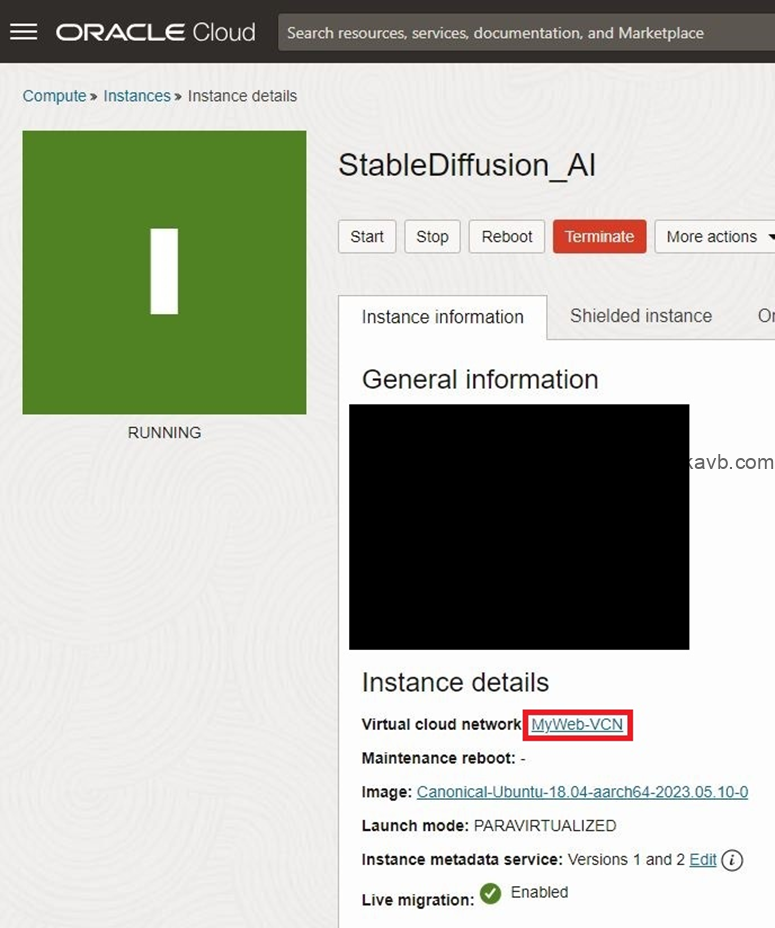
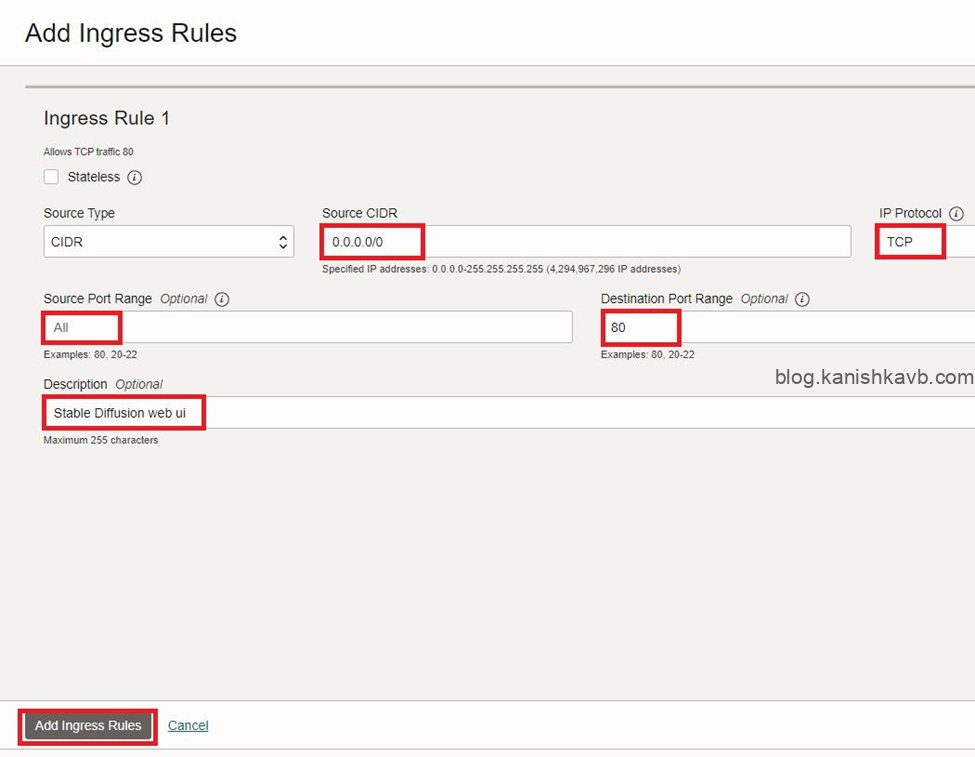
2. Go to the Security Lists section by going to virtual cloud network > Subnet > Security list and go to Add Ingress Rules
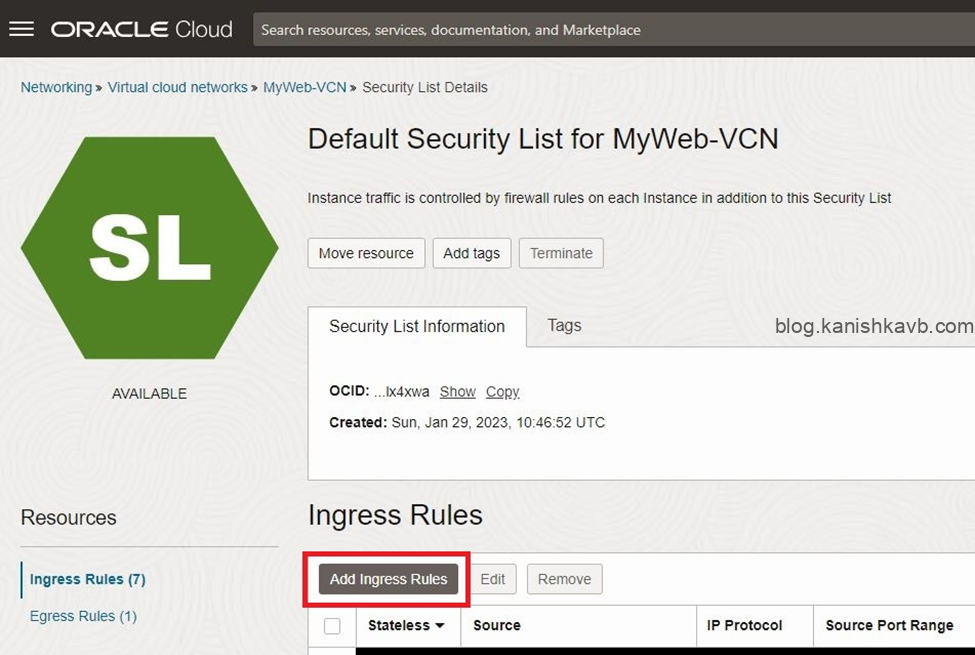
3. Now add port 80 so the HTTP traffic is allowed. Click on Add Ingress Rules to save it.
4. Now SSH into the instance and add an iptables rule to allow traffic into the instance itself on port 9000 (because we will be using nginx to direct HTTP traffic from public IP to 127.0.0.1:9000)sudo nano /etc/iptables/rules.v4
Add the following line and press Ctrl+X and y to save and exit
-A INPUT -p tcp -m tcp –dport 80 -j ACCEPT
Now the ‘door is open’ to accept the web traffic so we can access the web UI. But we have one last thing to do. That is to install and set up nginx as a reverse proxy so it will direct the HTTP request from your PC to the Stable Diffusion server web UI running on http://127.0.0.1:9000 in the instance. Let’s get nginx going,
- SSH into your instance and install nginx. And make sure that the nginx service is running.
sudo apt install nginx
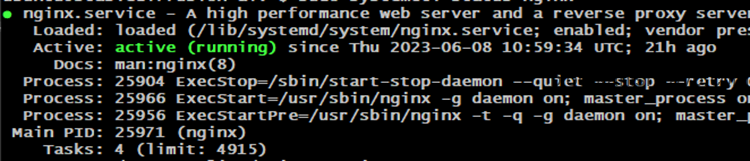
sudo systemctl status nginx
the result should look like this with “active (running)” status,

2. Now create a custom configuration file for the Stable Diffusion serversudo nano /etc/nginx/sites-available/StableDiffusion
3. Paste the following configuration onto the file. Make sure to replace X.X.X.X with your own instance’s public IPv4 address. Press Ctrl+X and y to save and exit.
server {
listen 80;
listen [::]:80;
server_name X.X.X.X;
location / {
proxy_pass http://127.0.0.1:9000;
include proxy_params;
}
}
4. Now add the new configuration file to enabled sites by creating a file linksudo ln -s /etc/nginx/sites-available/StableDiffusion /etc/nginx/sites-enabled/
5. Make sure there are no syntax errors in the configurationsudo nginx -t
The result should look like this,

6. Restart the nginx service and make sure that it is runningsudo systemctl restart nginx
sudo systemctl status nginx
the result should look like this with “active (running)” status,
Now we are good to go. You can SSH into the instance and start the Stable Diffusion server and you should be able to connect to it via the public IP. Let’s do this,
- SSH into the instance and start a screen session so that you can safely disconnect from the instance without stopping the server. What we’ll do is create a screen session and start the Stable Diffusion Server within that session and then detach from the screen session. The server will be running inside that screen session and it is safe to close the SSH session.
screen -S StableDiffusion
bash start.sh
once the server is fully started and initialized, you may detach from the screen session by pressing Ctrl+A and then pressing Ctrl+D.
If you ever want to connect back to the screen session, you can do it by listing the current screen sessions running and then connecting to the desired one.screen -ls
screen -r NameOfYourScreen
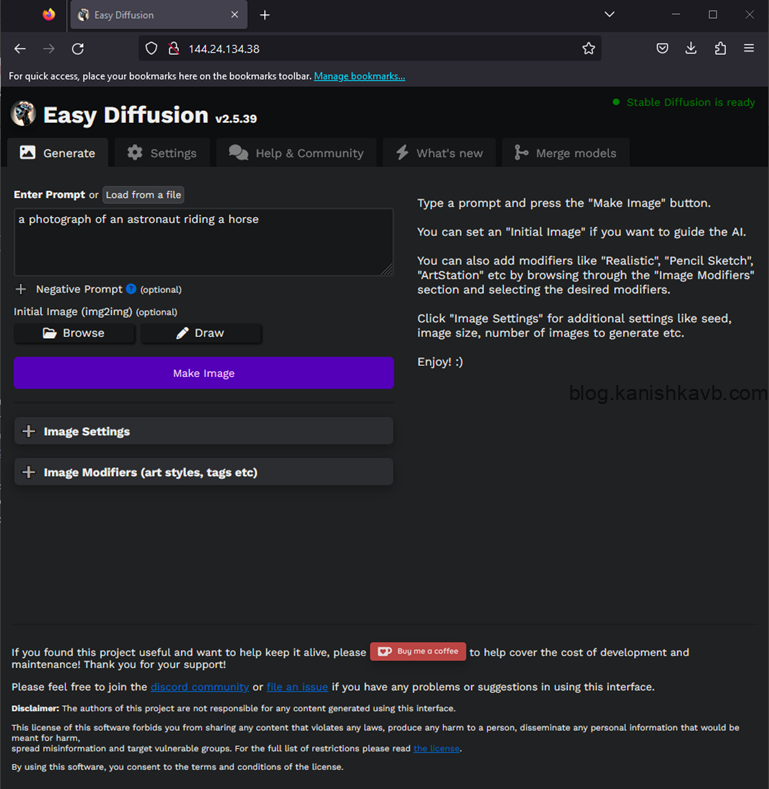
You can do a Ctrl+C and exit command if you want to terminate the screen session. I use the screen whenever I need a persistent SSH session or when I do not want to worry about getting disconnected and having to start over. It’s simple and convenient. - Now open a web browser and access type the public IP of your OCI instance. By default, the browser will access it on port 80. Our nginx service will take that request and forward it to the actual Stable Diffusion web UI running on port 9000 inside the instance. If you did the above setup successfully, you should see the web UI.
If you don’t see the web UI, make sure that nothing on your local network or the PC itself is blocking it. If you still can’t load it, make sure all services on the OCI instance are running as they should be. A handy trick you can use is to use a service like YouGetSignal. They have a port forwarding checker which you can use to test reachability. Simply go to https://www.yougetsignal.com/tools/open-ports/ and enter the public IP address of your OCI instance and the port 9000 then click on Check to see if the port is open or not. The port to be ‘open’, the traffic should be allowed from the OCI Virtual Cloud Network security rules, and iptables in the OS itself. And the nginx must be functioning properly with the correct configuration to forward the traffic. Finally, the Stable Diffusion web UI itself must be up and running. Those are the points you need to troubleshoot if you cannot load the web UI. Assuming everything went well for you, you should see the following web page when you type in the public IP of you instance to a web browser,
Going through hours of research, configurations, and troubleshooting and finally getting something to work and seeing that first ‘ping’ or seeing it work for the first time is one of the greatest joys of my life. You know what I’m talking about if you share the same passion. Cheers!
Now you can type in anything you want into Enter Prompt window and click on Make Image to generate images. There are lots of settings you can adjust to change the result. There is a lot of exploration. A few tips I can give you is that 512X512 image size yields the best results. You can take a resulting image and feed it back into the model to fine-tune it or enhance it the way you want. You loop it multiple times and get stunning results. Also, the image-to-image option is quite fun. You can feed it an image and ask it to change things.
It will take around 10-11 minutes for one image to get generated. Like I said at the beginning it’s slow because we do not have a GPU. But it’s free and fun. What I do is that I give it a load of images to generate (it will queue it and generate them sequentially) and then close the browser and go about my day. Later I can come back and view the results. If you are following that, make sure to turn on the autosave option in the settings and then you can just make a scp download of the results to your PC.
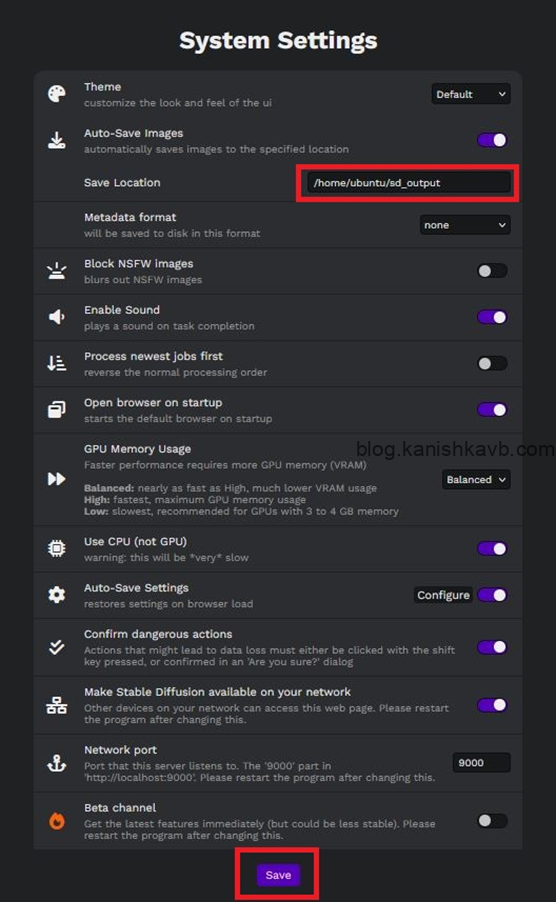
scp -i SSHKeyFileName.key ubuntu@X.X.X.X:/home/ubuntu/sd_output/1686274170217/* .
Above command will download all files in /home/ubuntu/sd_output/1686274170217/ to the current working directory of your local machine. Make sure to enter your own SSH key file name (assuming your working directory is in the same directory as the key file. Otherwise, you need to specify the path of the keyfile as well), and the public IP of your OCI instance.
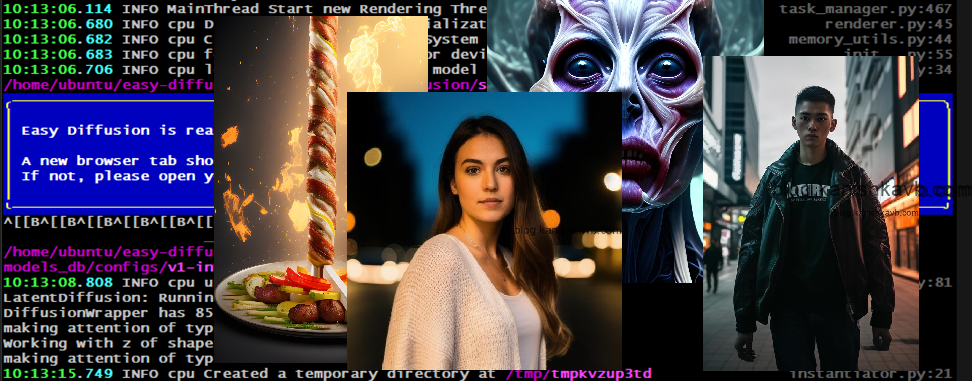
Now a couple of things I want to mention here. I have not made this setup secure. The public IP is open to the world. Anyone can access it via the default port 80. There is no authentication to the Stable Diffusion server. So theoretically if someone knows your OCI instance’s public IP, they can access the web UI and use Stable Diffusion. Not only that, but we are also using HTTP here – not HTTPS. This means all communication that you do via the web UI is unencrypted. If you are a guy like me that works in production environments in real-life, these points I mentioned should make your brain itch 😉. Because these are massive security concerns and huge no-nos in a production environment. But this is just a hobby project with nothing to lose. We have no confidential data to be leaked; we have no real infrastructure to be damaged. It’s all running on a free cloud VM (which itself is secure). All someone can do is, connect to our web UI and generate some images or mess up the settings. So, I wouldn’t worry about it unless I am using it for any kind of important / long-term project. This is just for educational / testing purposes. Here are some of the images I generated using this setup:


I am sorry, that I interrupt you, but it is necessary for me little bit more information.
You should write more!